There are a lot more steps to shower installation than the average person may be aware of. Waterproofing, while one of the most underappreciated steps, should never be overlooked.
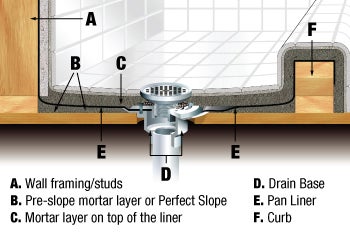
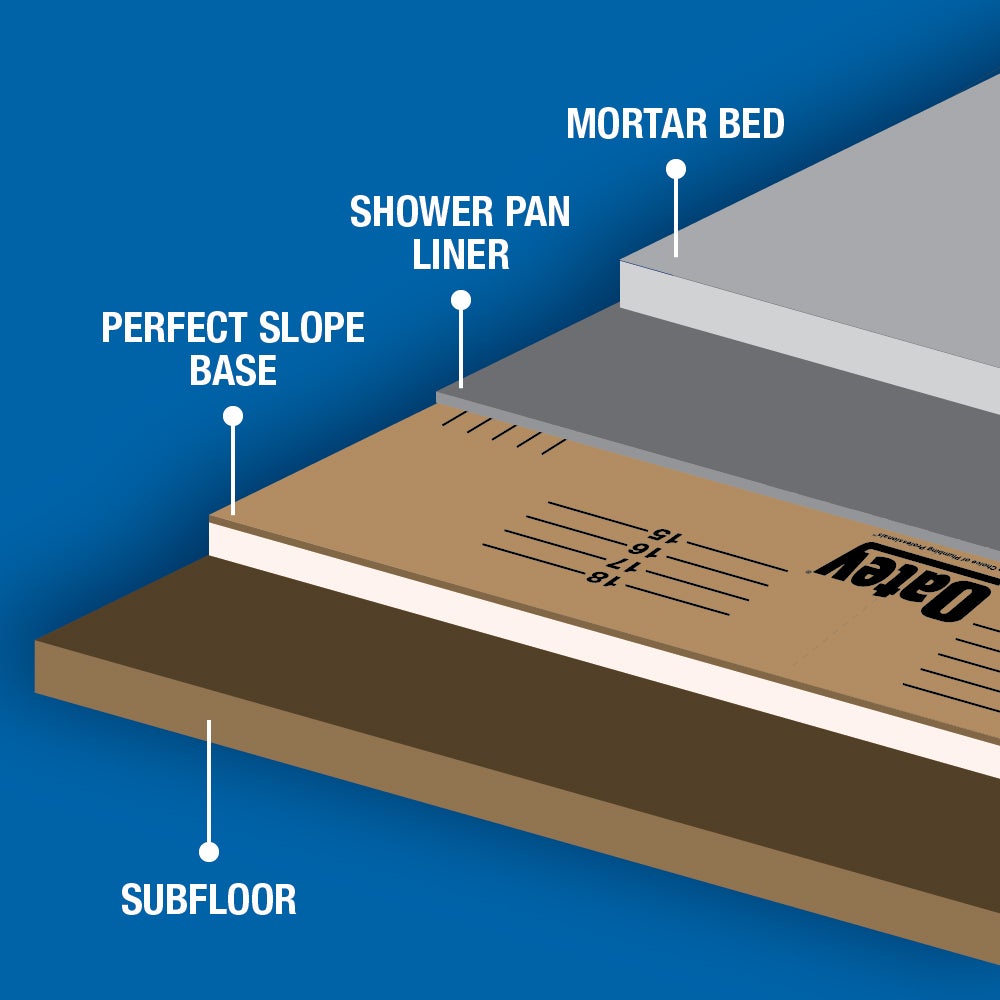
In a typical shower construction model, there are five layers to the shower floor: the subfloor; the slope base or first mortar bed; the shower pan liner; the final mortar bed; and shower tiling or floor. The shower pan liner is the most important aspect when it comes to waterproofing, since it protects both the porous shower wall framing and lower floor layers from eventual water permeation and subsequent moldy outbreak.
Disclaimer: This guide concerns typical center point drain installation. If you are working with a linear drain or curbless shower design, head over to Quickdrain to view more specialized instructions.
Oatey’s shower pan liner kits come with one liner and 2 corner dams in a universal design for right or left corner installations. Oatey’s shower pan liners are offered with either CPE (CPE pan liners are recommended if your floor has a radiant heat system) or PVC sheet material at 30 mil. or 40 mil. thickness, and include a range of dimensions such as:
• 5 ft. x 6 ft.
• 6 ft. x 33 ft.
• 5 ft. x 40 ft.
• 4 ft. x 50 ft.
• 5 ft. x 50 ft.
• 6 ft. x 50 ft.
• 5 ft. x 100 ft.
• 6 ft. x 100 ft.
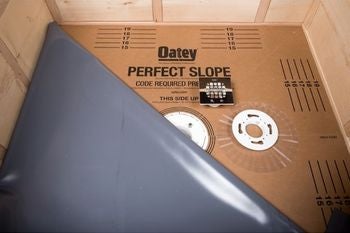
• Oatey 130 Series Tile Shower Drain
• Wrench
• Mortar
• Oatey Perfect Slope (optional)
• Silicone caulk
• Marker
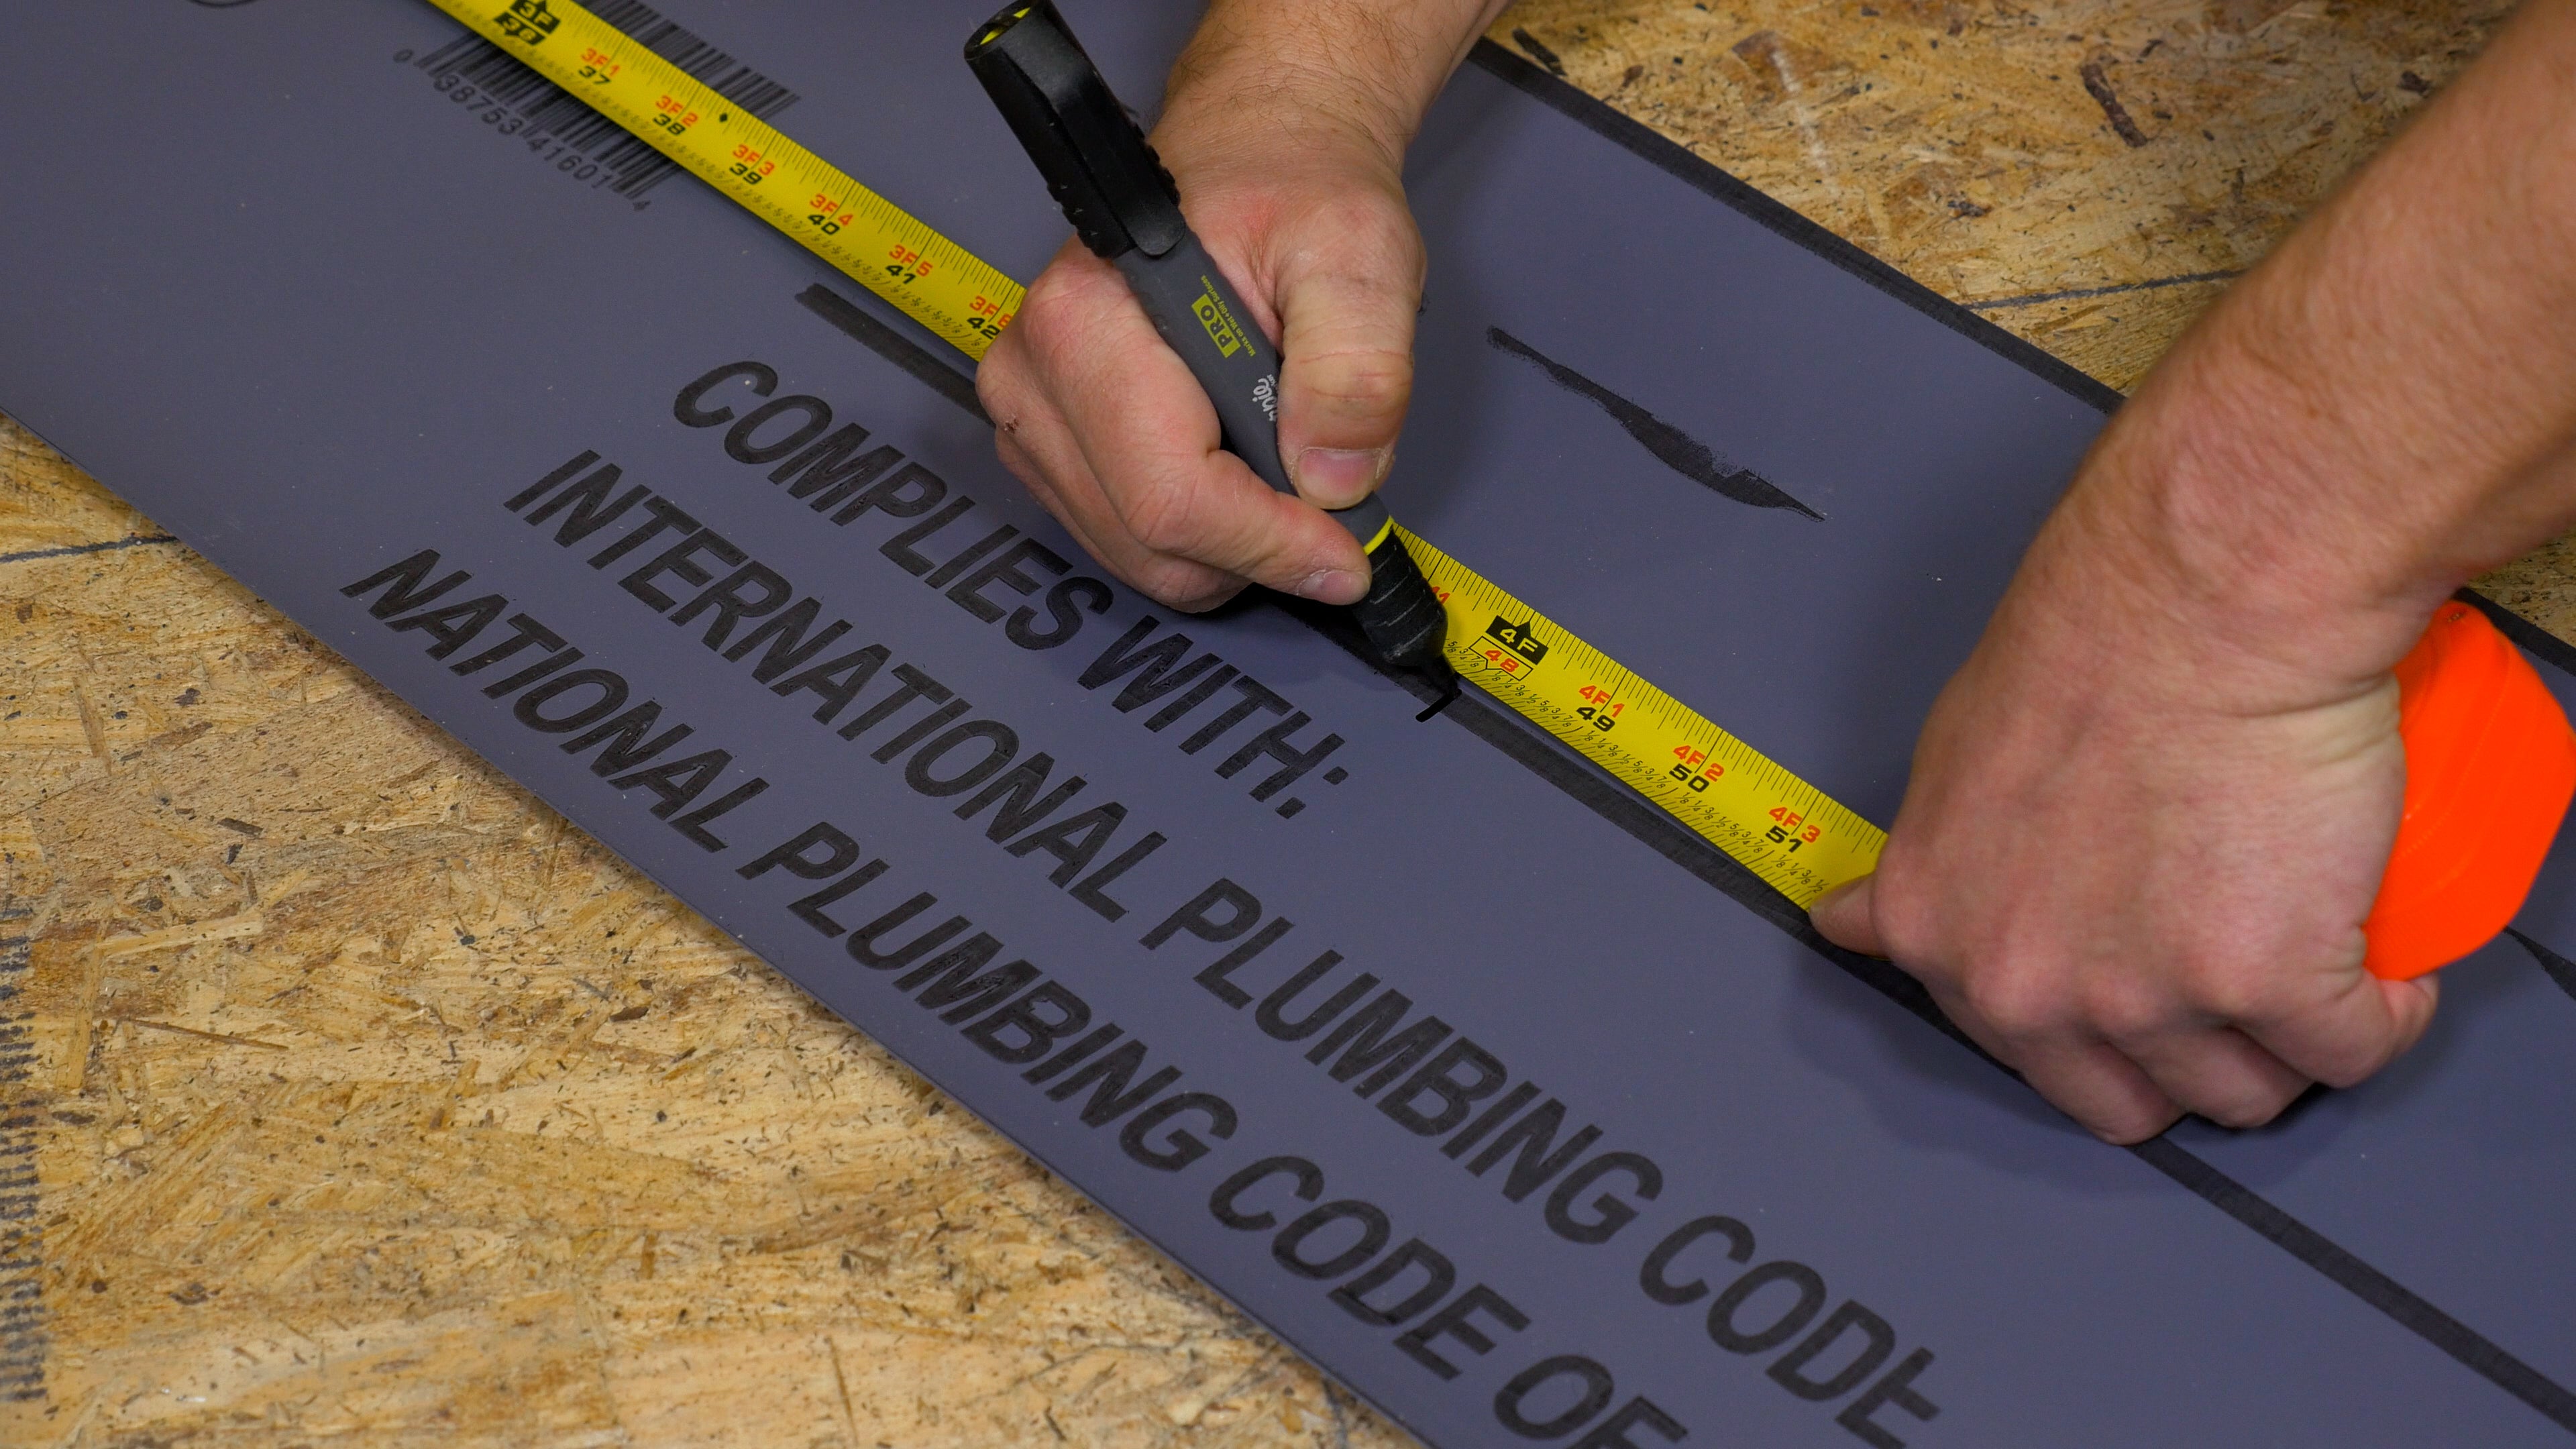
• Measuring tape
• Utility knife
• Staple gun or hammer and nails
• Oatey Weld Bonding Adhesive (only for use with CPE liners)
• Oatey X-15 LO-VOC Bonding Adhesive (only for use with PVC liners)
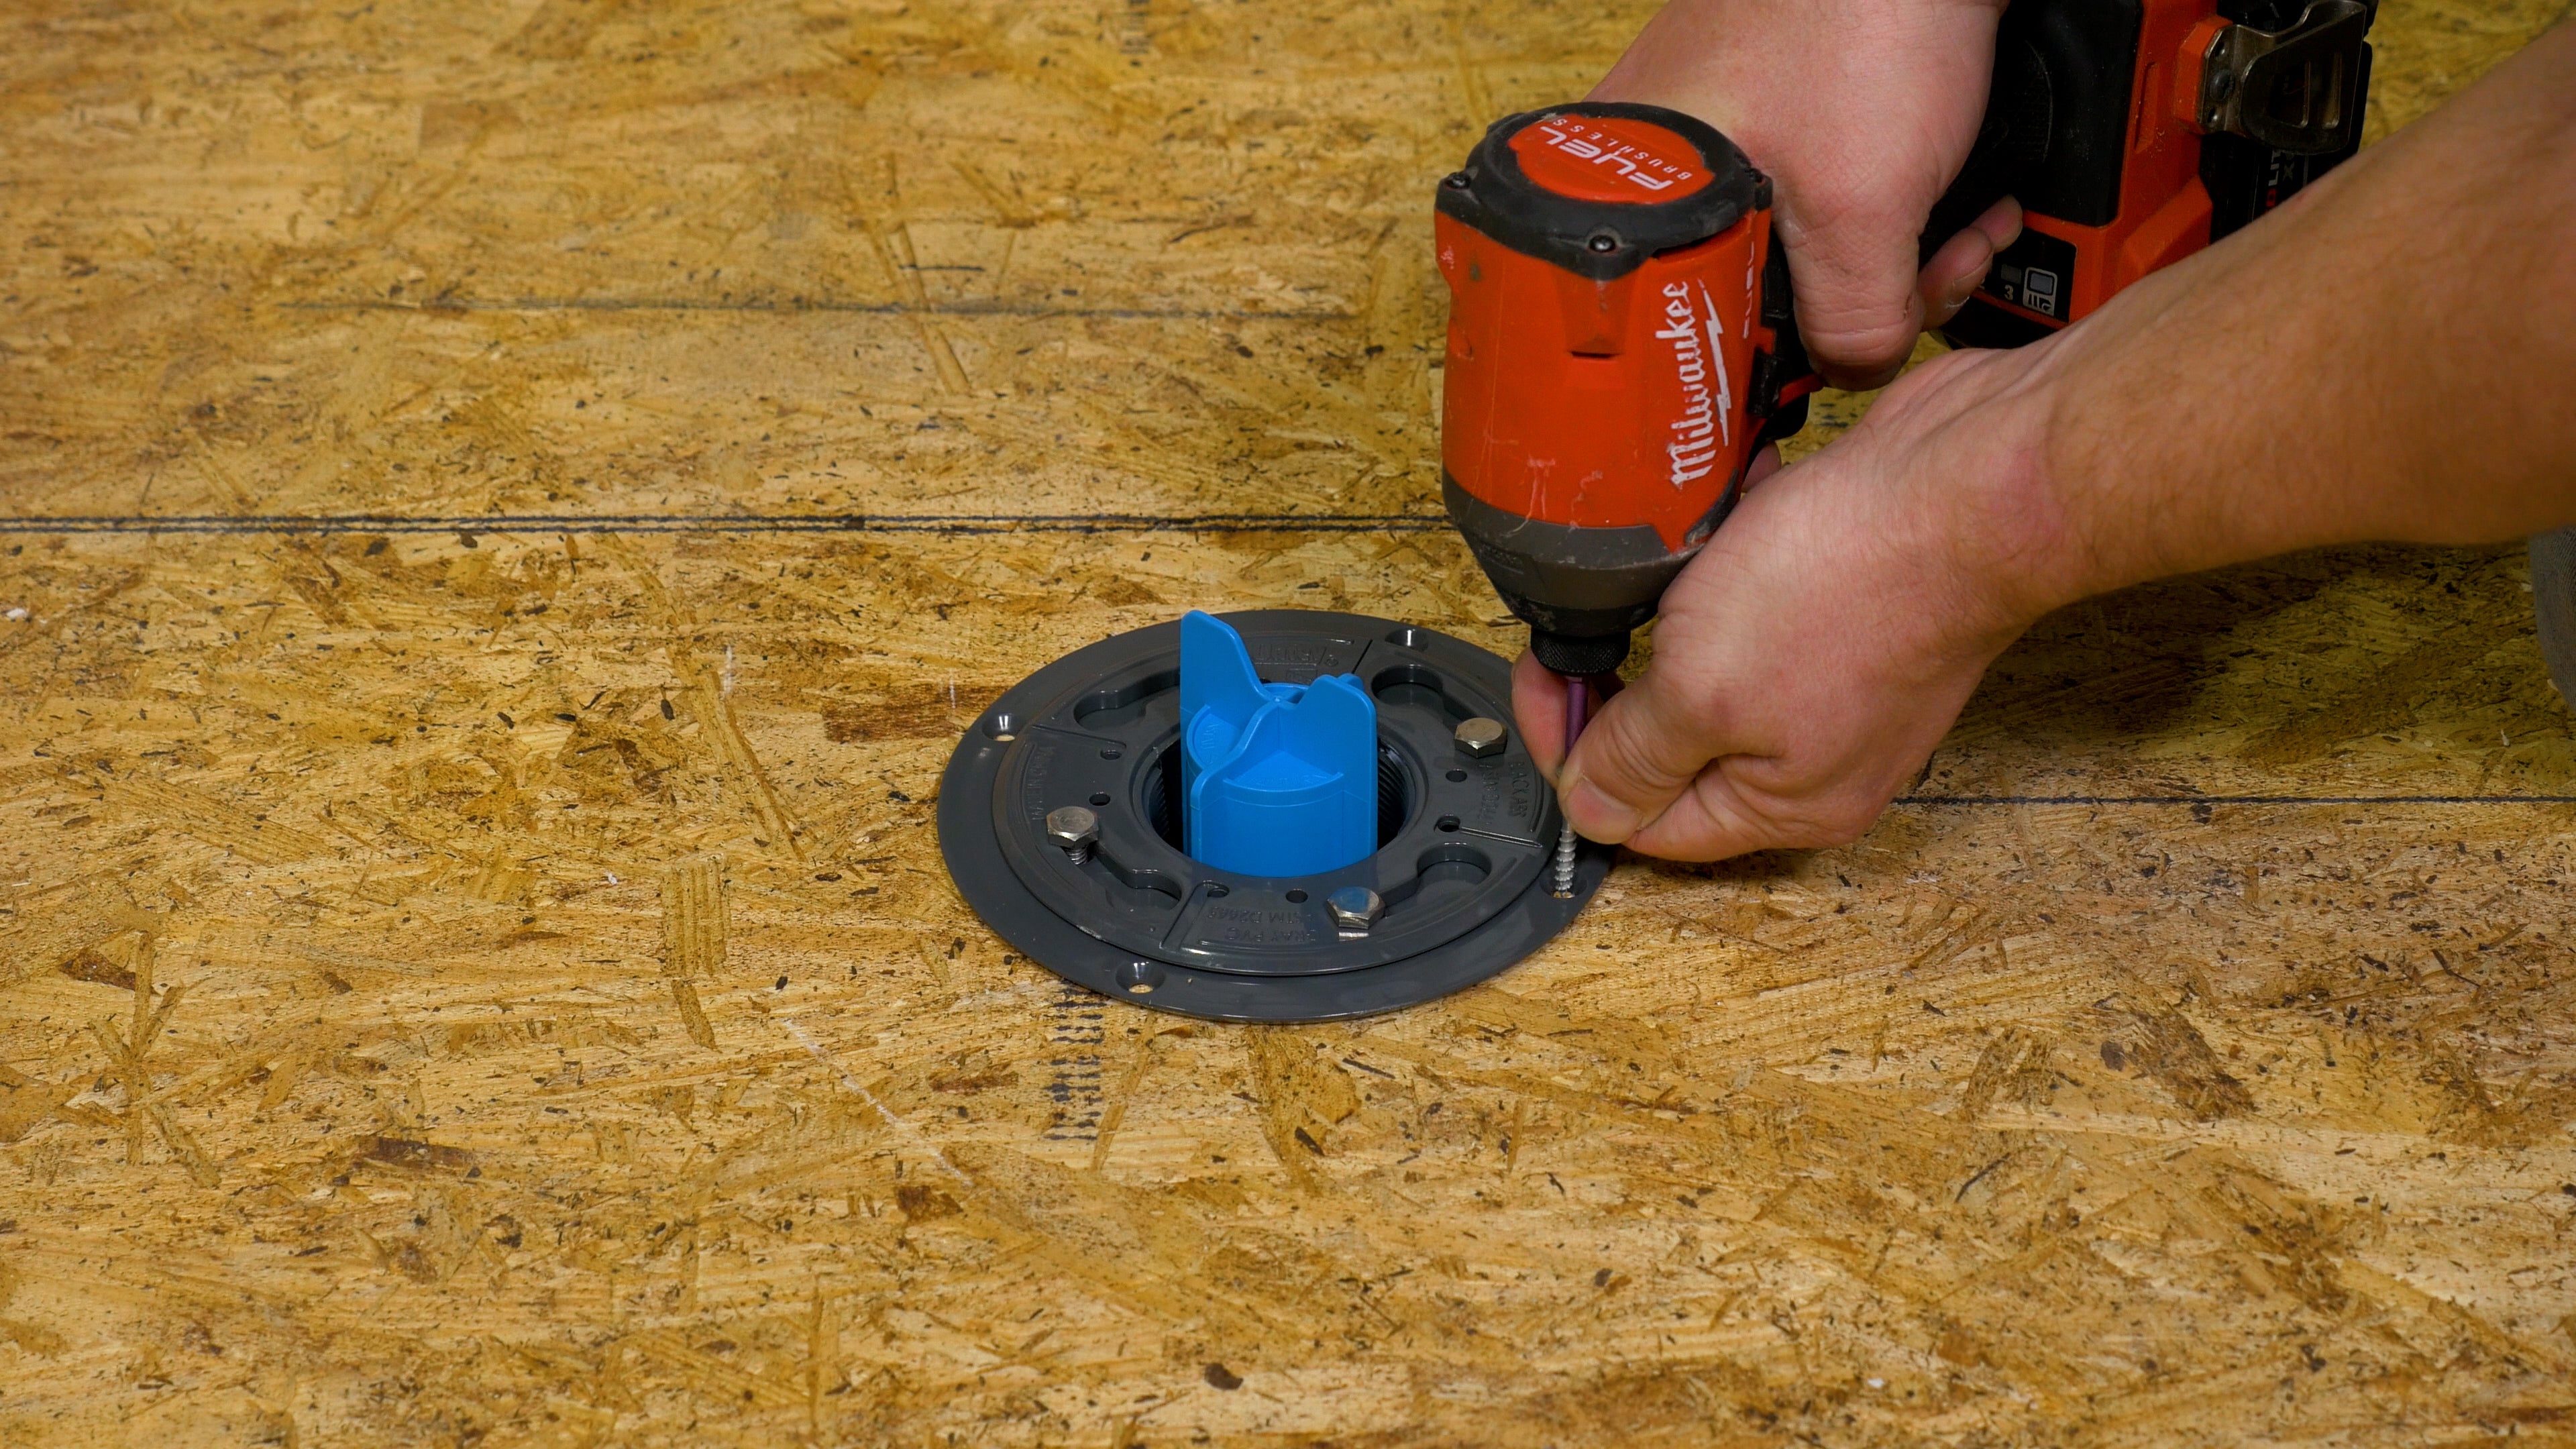
Start by placing your drain base into a pre-made hole (a 4-1/2 in. hole is recommended for Oatey tile shower drains) and screw the flange to the subfloor. If your drain is pre-assembled, loosen the bolts connecting the clamping ring to the flange and remove the clamping ring, but leave the drain plug in place in the middle of the drain.
Tip: If you don’t have a drain plug, you can use duct tape to cover the drain hole, although you will need a drain plug later.
Warning: It is not recommended to use felt paper with the pan liner since the petroleum in the felt paper can react with the liner, causing it to crack or become brittle, which can lead to leaks.
You have two options when preparing the slope—mortar or Oatey’s Perfect Slope.
Tip: Oatey’s Perfect Slope is recommended for use of those without expertise in creating a perfectly sloped shower bed out of mortar.
Mortar
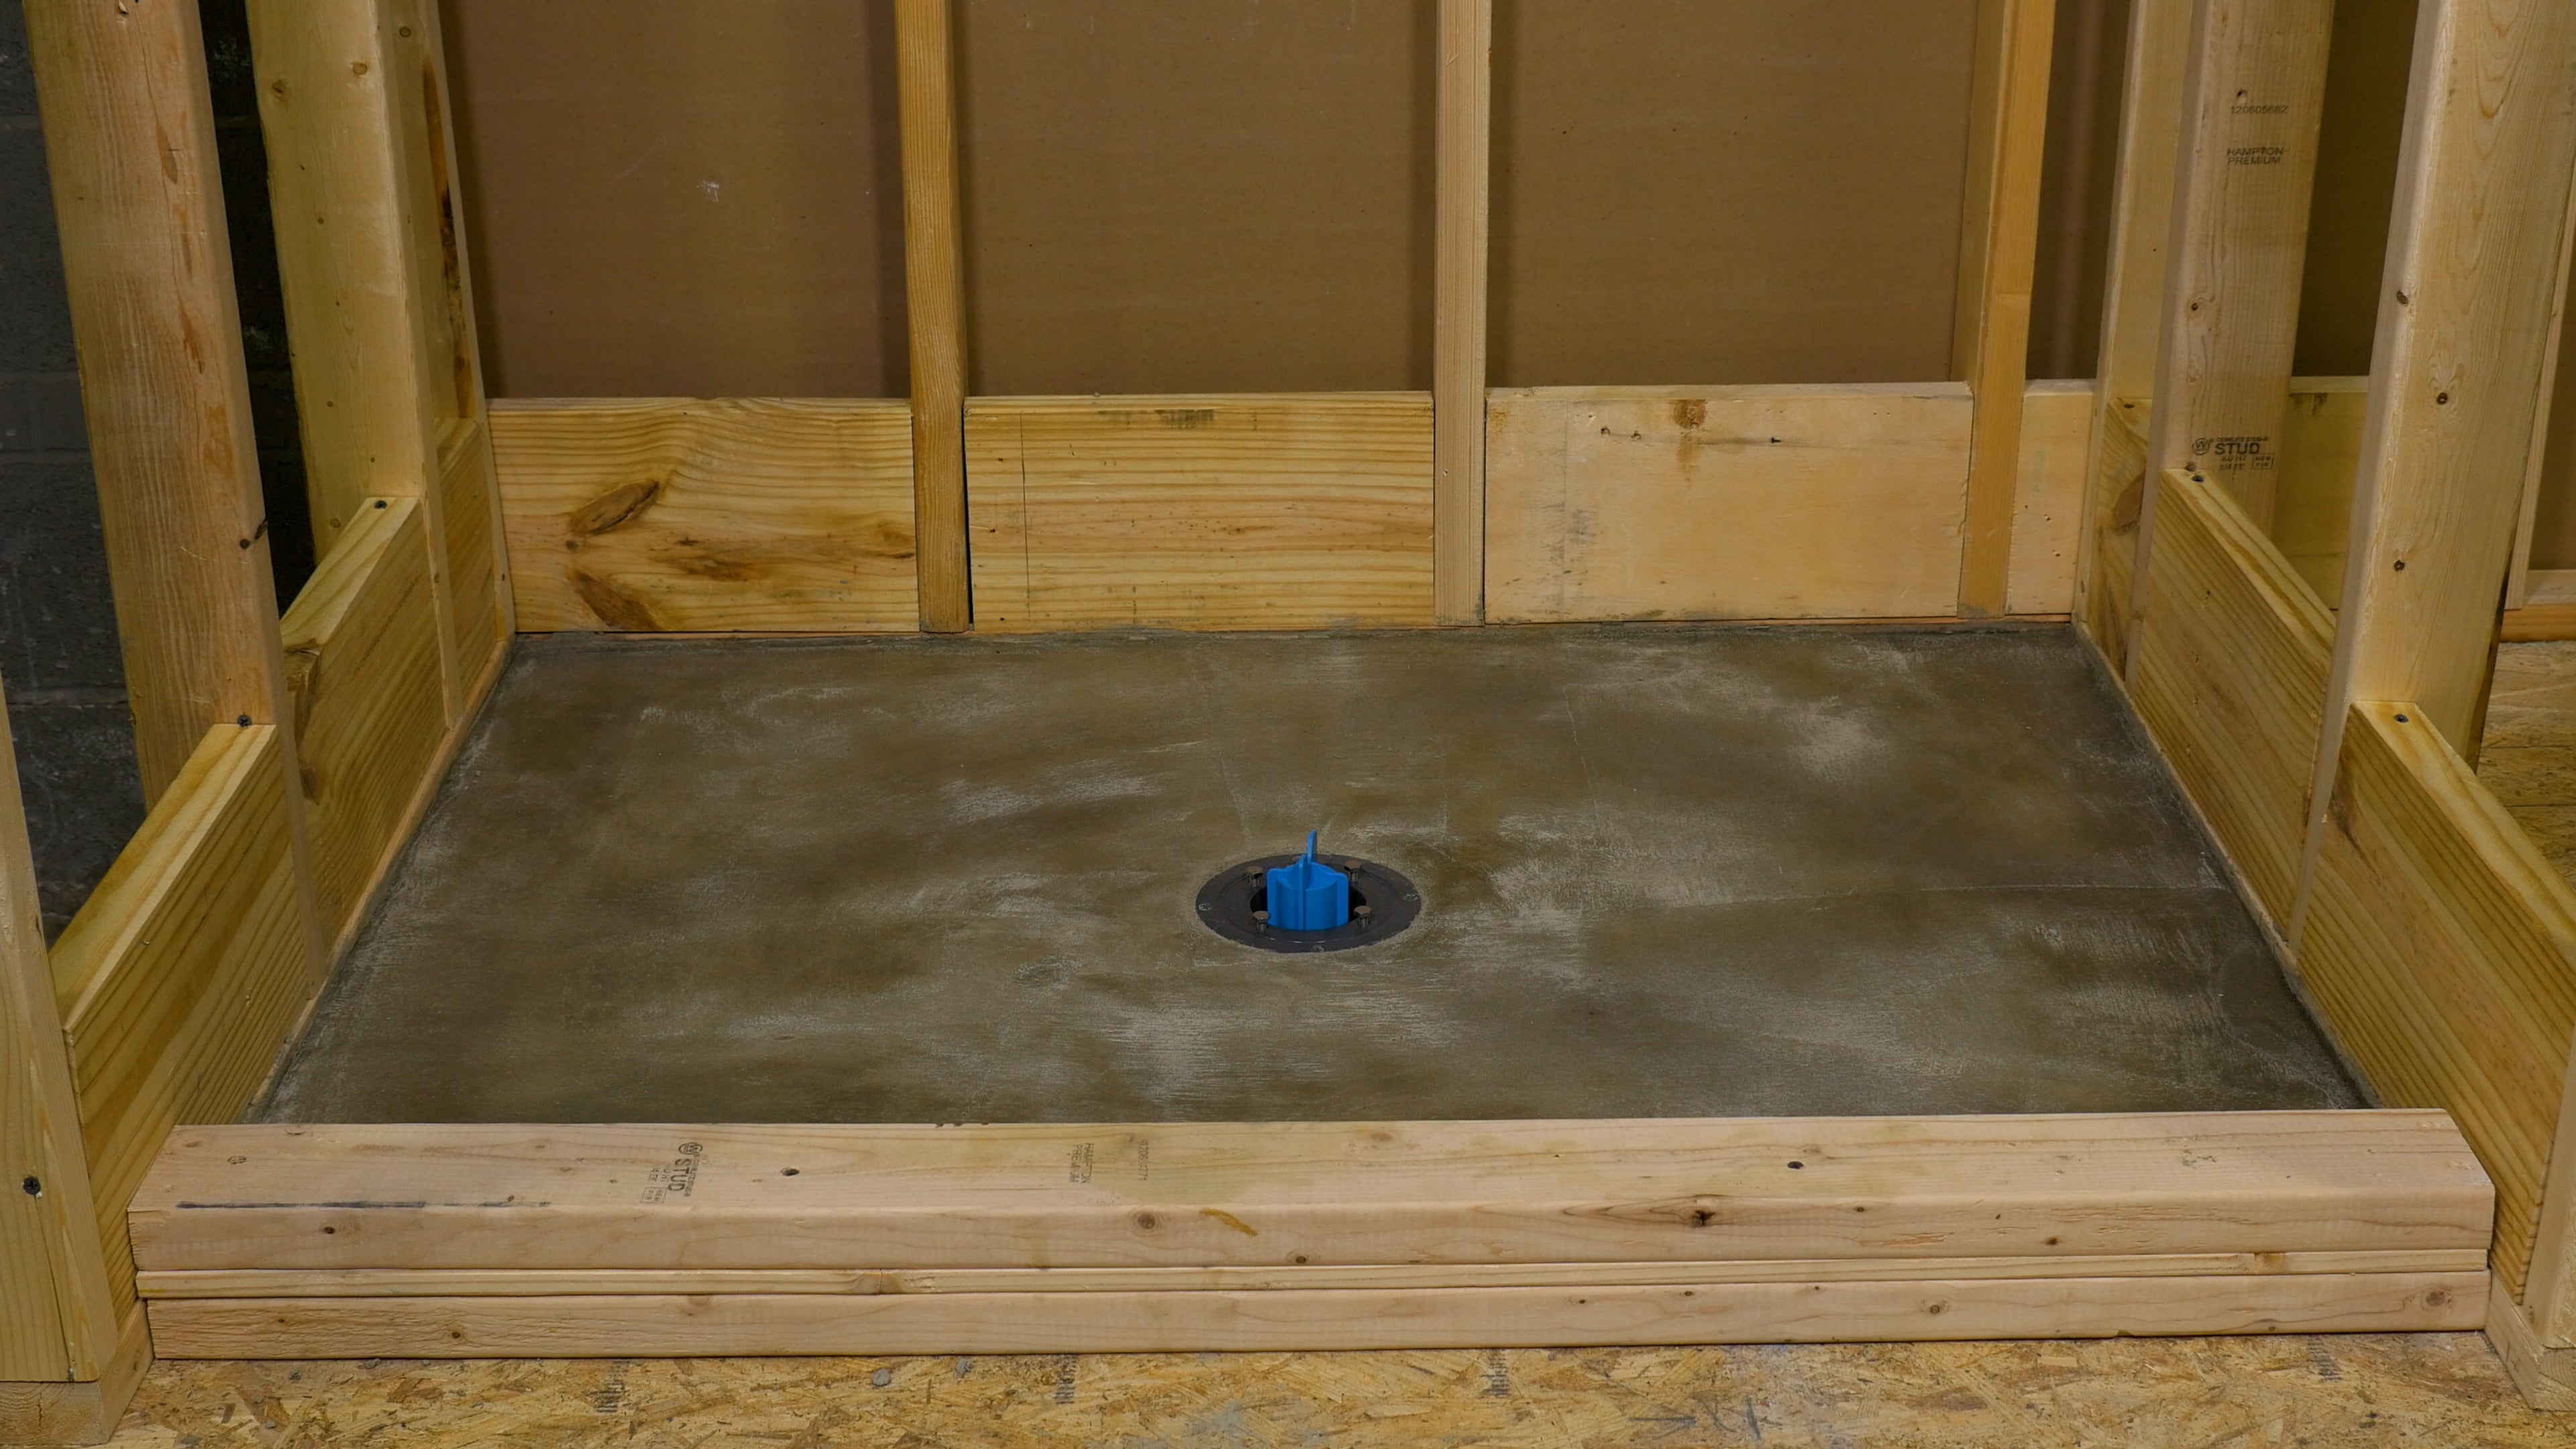
Pour mortar onto the subfloor at ¼ inch per foot sloped inward from the wall framing to the top of (but not over) the drain base. After this, leave the mortar bed to cure according to mortar instructions.
Perfect Slope
If you want to save time and hassle, install Oatey’s Perfect Slope to the subfloor, making sure to trim the Perfect Slope to your shower dimensions, as well as around the drain for a flush fit. Application video and instructions are available at Oatey.com.
Note: Perfect Slope should be placed flat with the printed side facing upwards without using adhesives.
Tip: Oatey pan liners are marked in 6 in. increments for easy measuring.
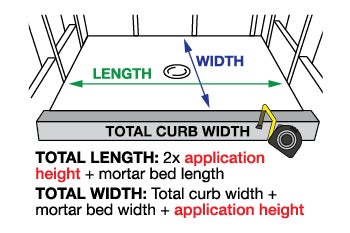
For overall curb width, measure the inside and outside heights of the curb, as well as the top width of the curb, and add them together.
Measure the length of the curb, then cut a piece of the liner off to those measurements. Staple this piece of liner over top and to both exposed sides of the curb.
Total curb width: Inside curb height + outside curb height + top width of curb
Start by making sure the pre-sloped mortar bed or Perfect Slope is dry and free of debris. Make a five- inch mark up from the curb onto the wall framing. Take measurements from that mark down to the mortar bed to determine application height.

Lay the shower pan liner on a flat surface. Measure and mark the total length and width of the mortar bed according to the diagram below. Finally, cut the pan liner according to your markings.
Total mortar bed length: 2x application height + mortar bed length
Total mortar bed width: total curb width + mortar bed width + application height
Tip: Pre-fold the edges for easy application of the shower pan liner. Flip the liner over and mark it upwards from the edge according to the application height on three sides. Fold the sides at each mark.
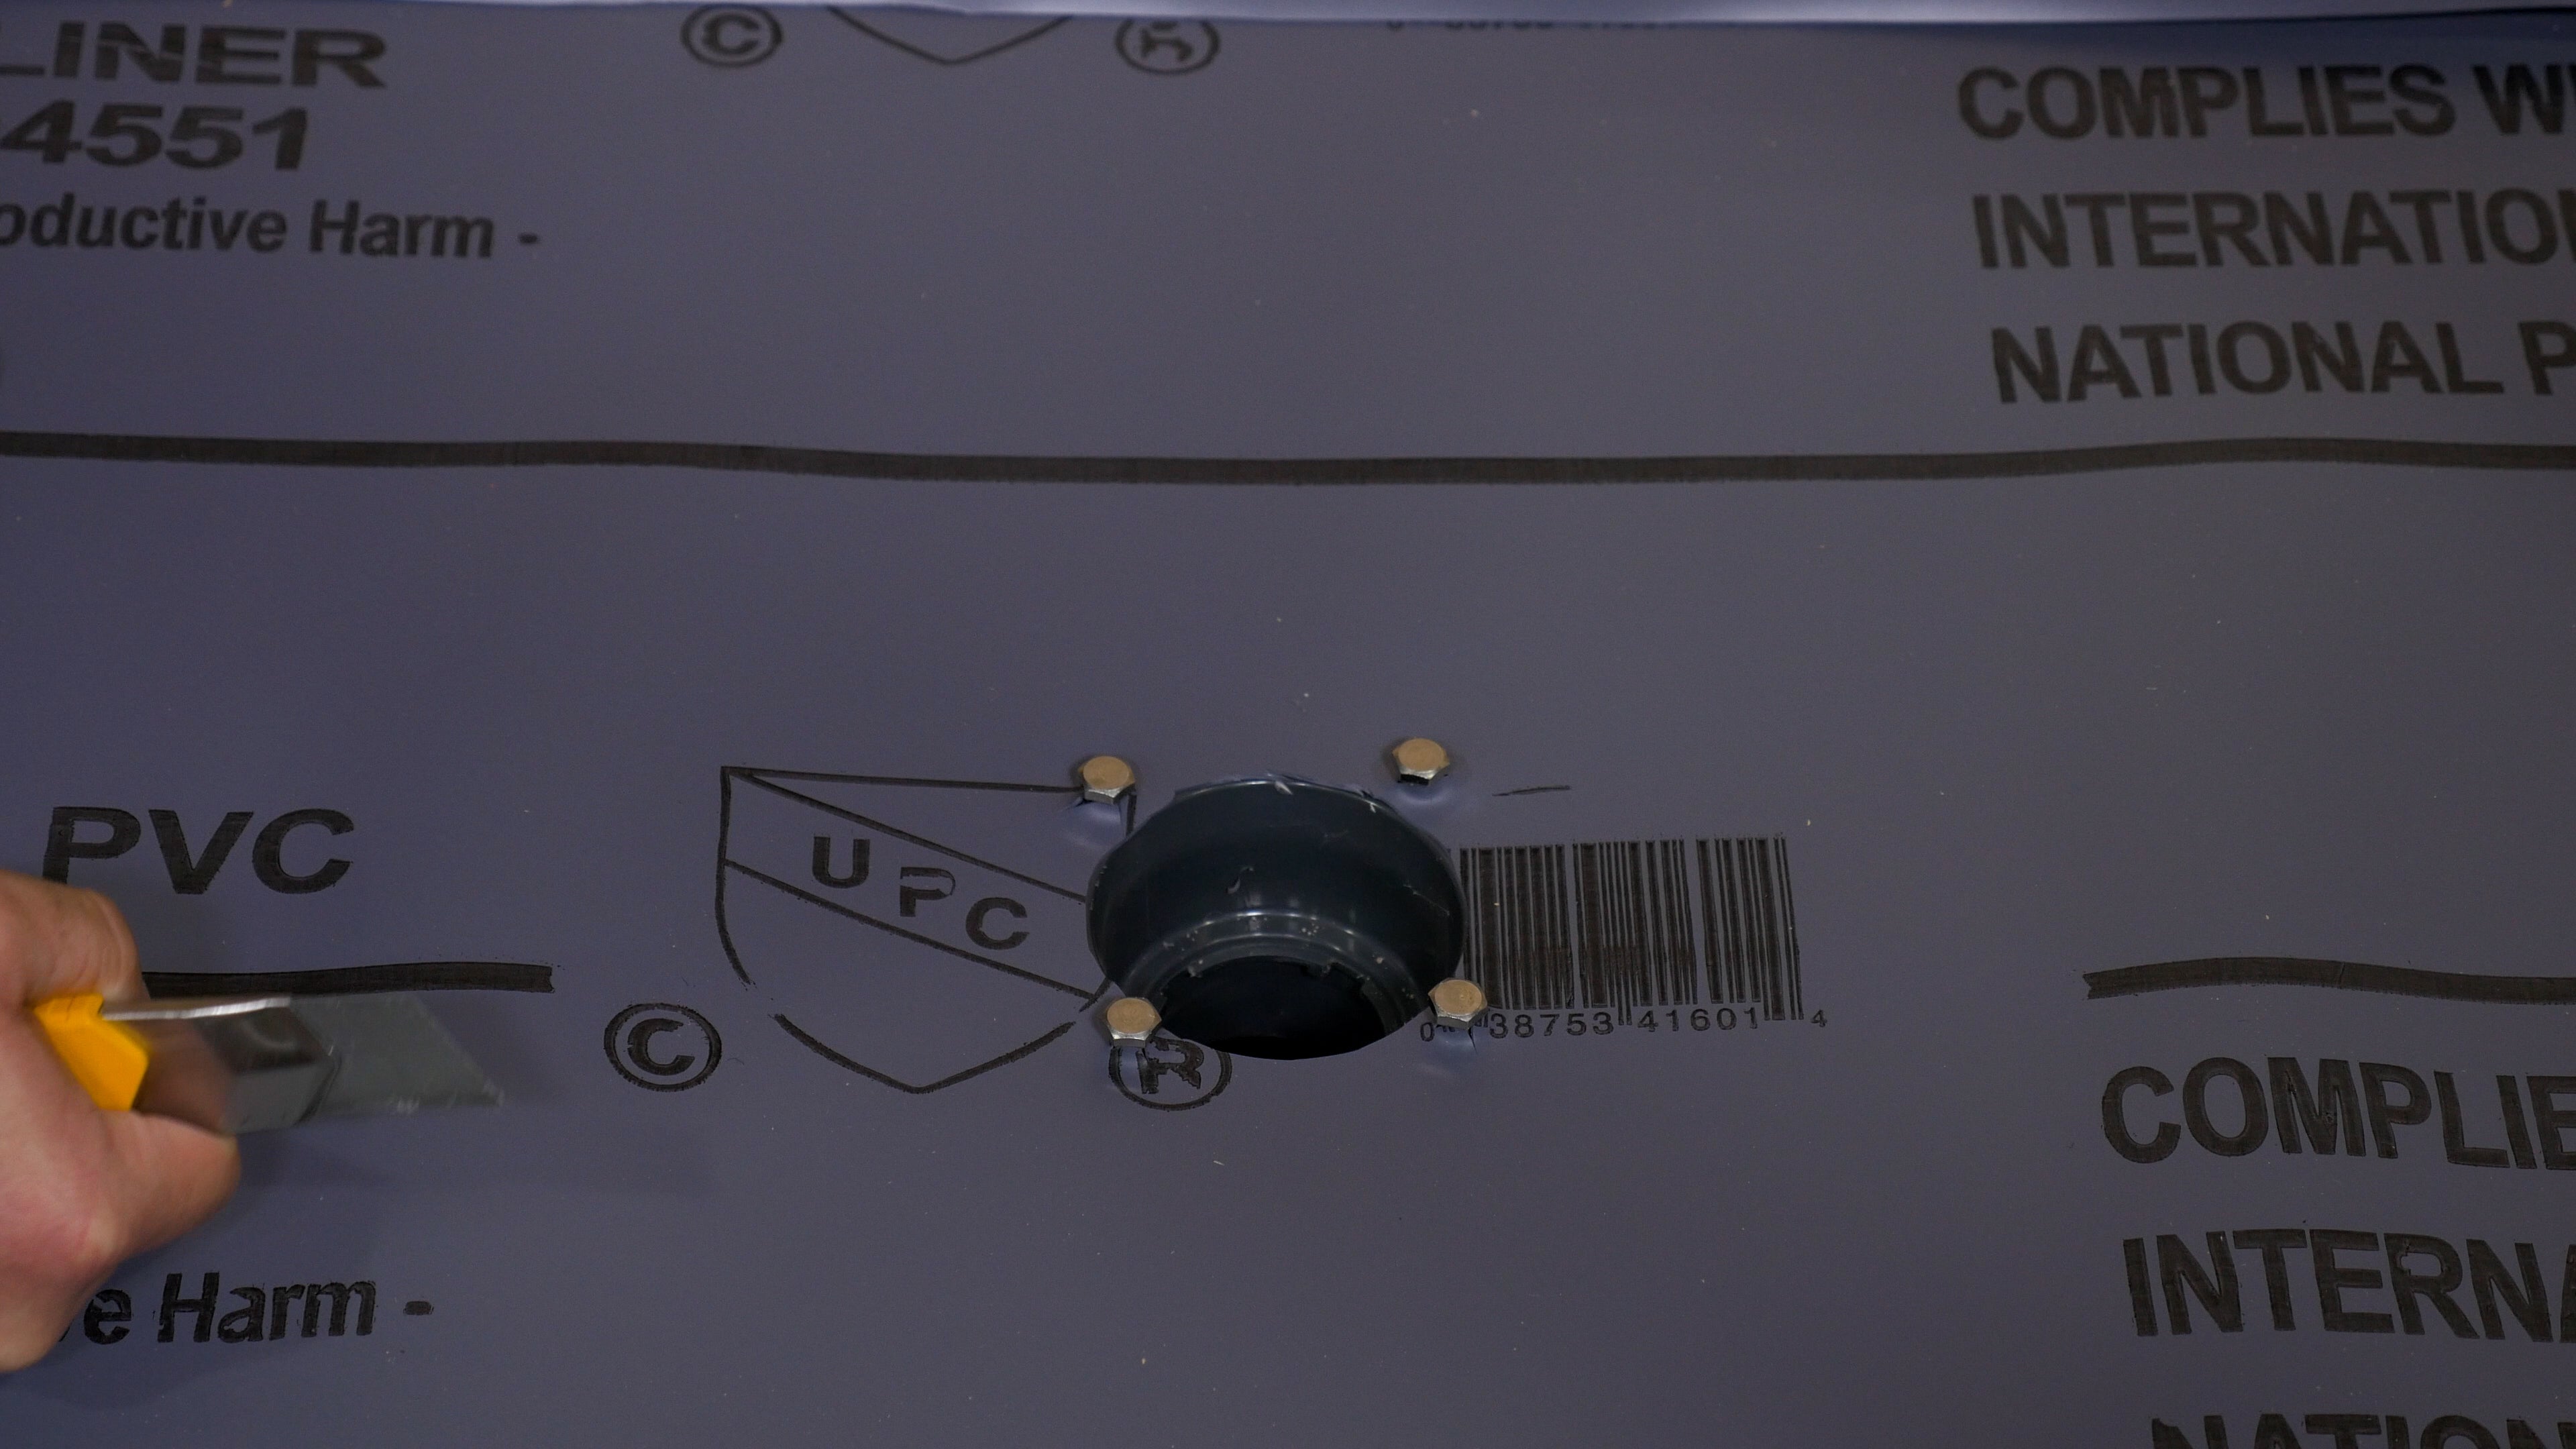
Remove the test plug from the drain and drape the pan liner over both the mortar bed and the drain base, making sure the wall-facing edges are folded according to the length of the application height. Ensure the pan liner is centered before you locate the drain plug. Cut X shapes over the four bolts that the clamping ring screws into. Also cut out a hole over the drain hole.
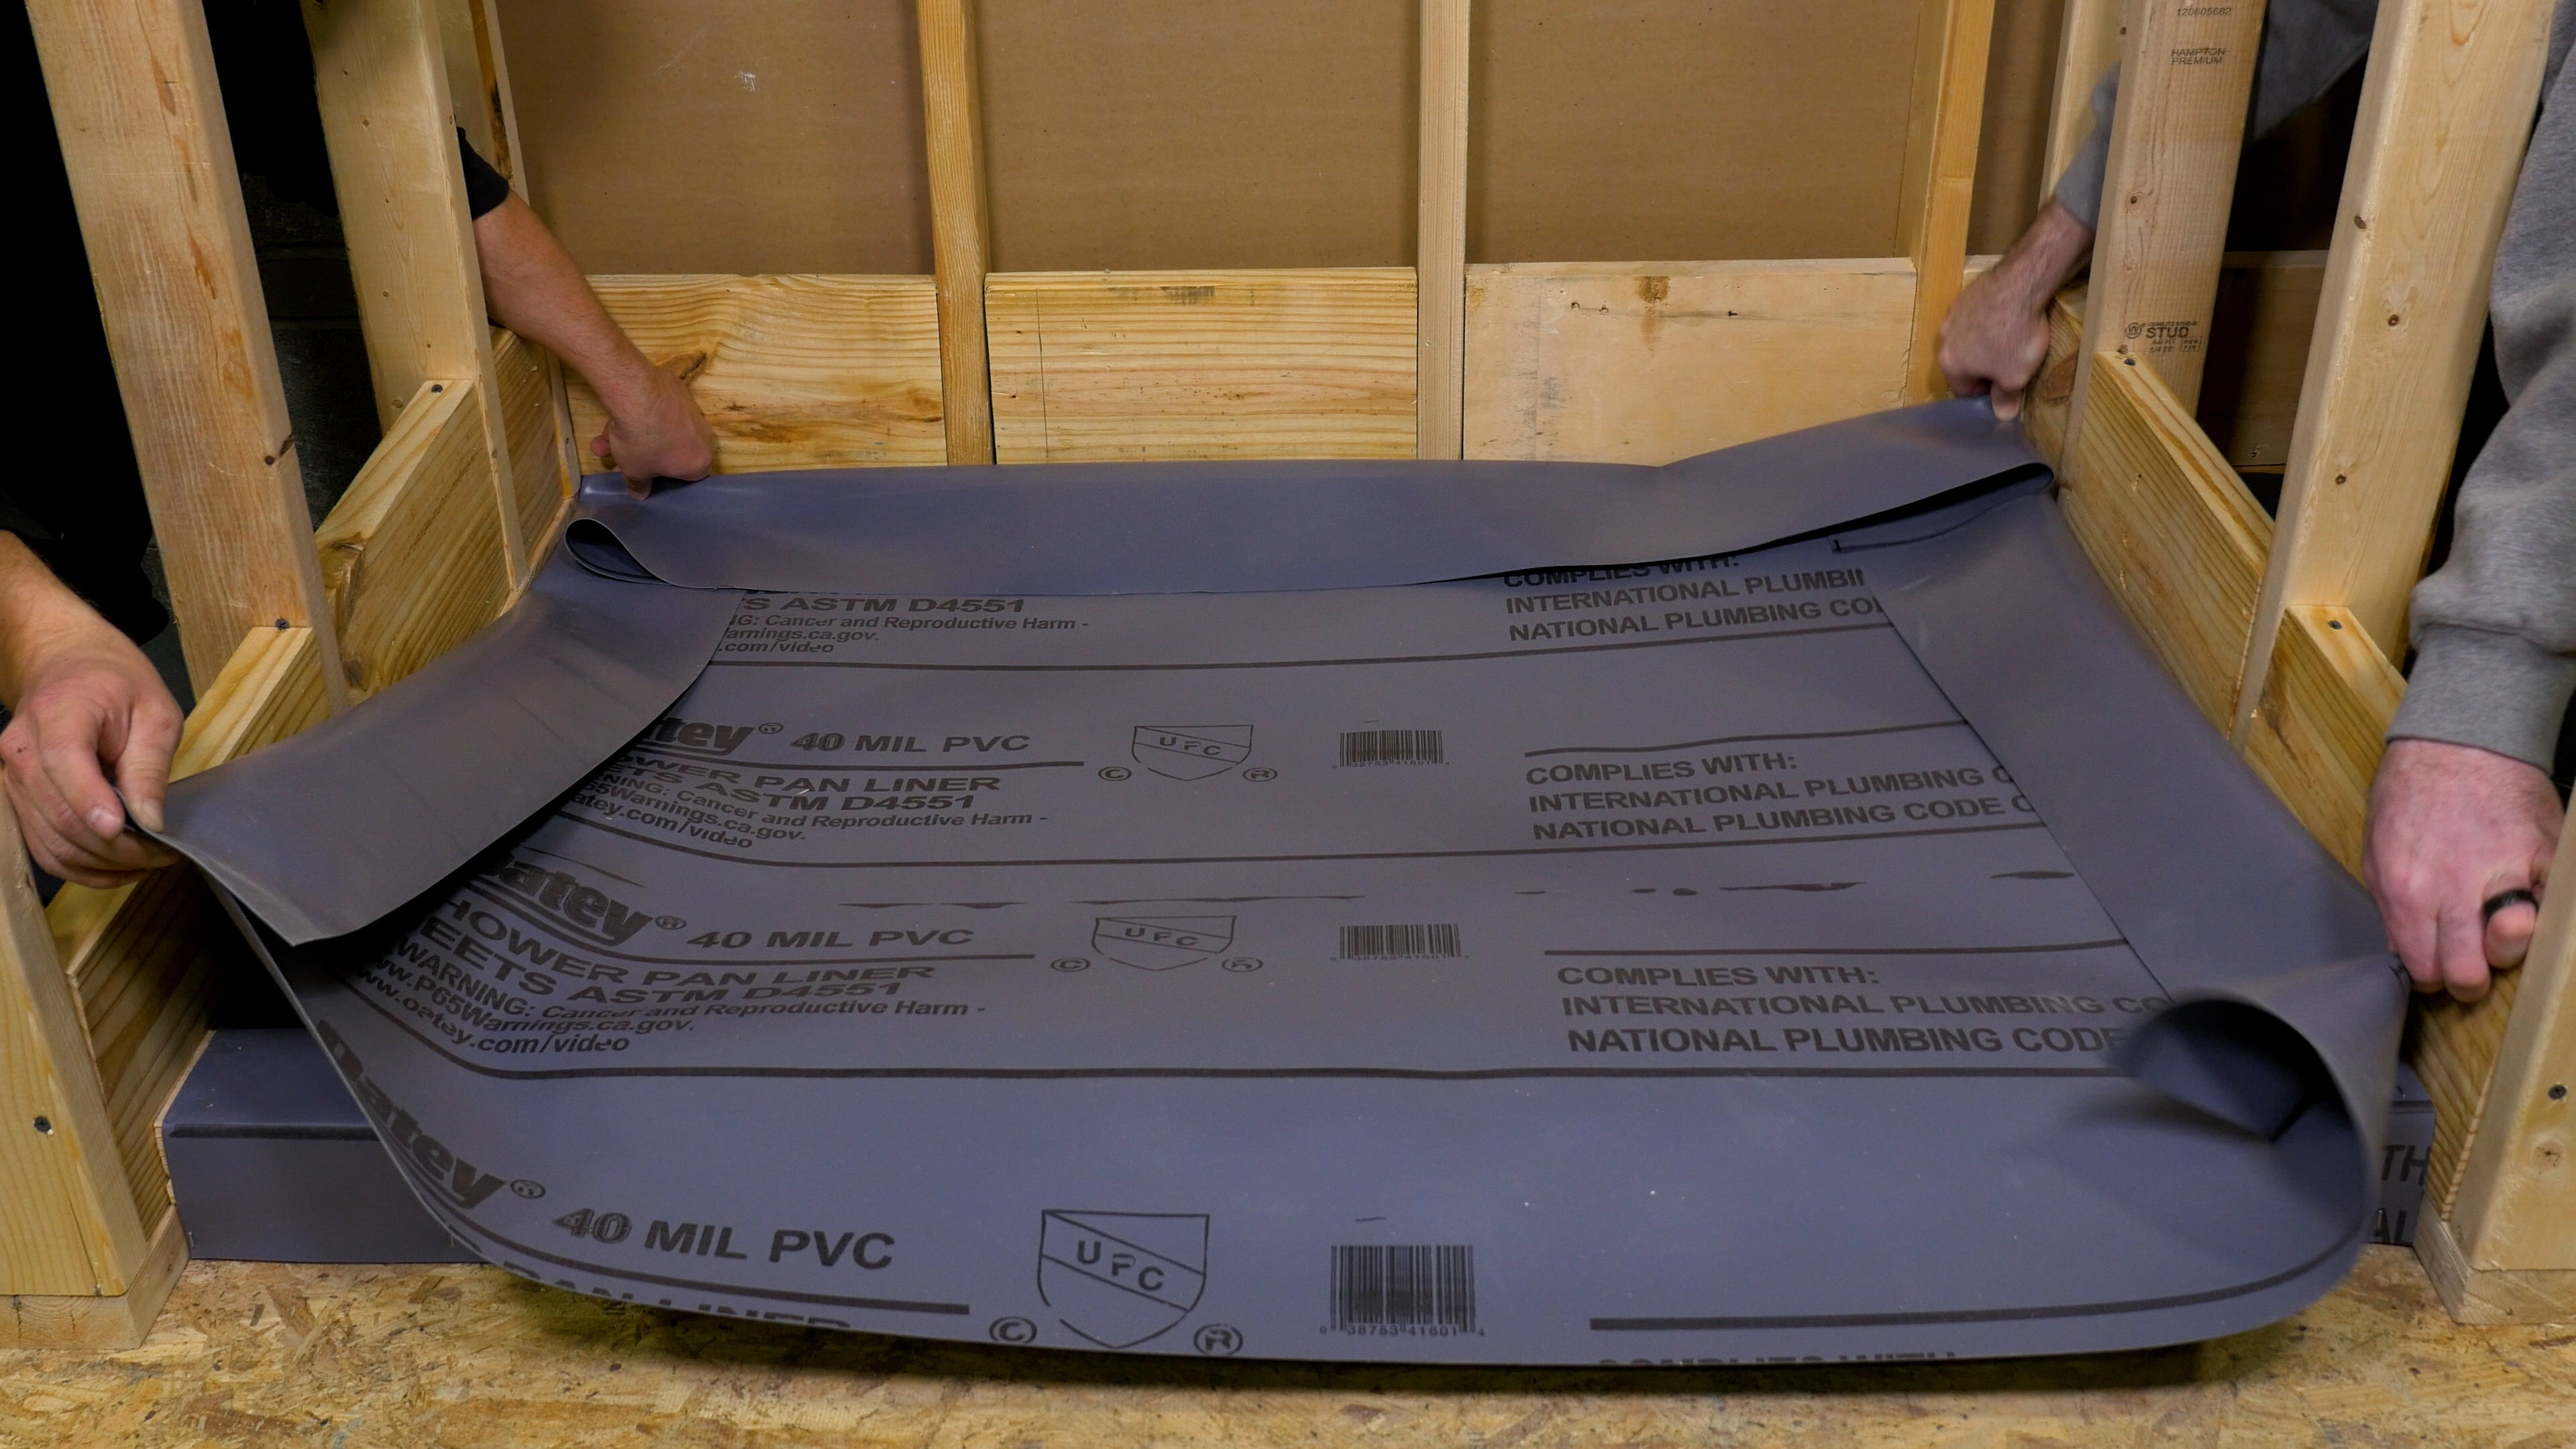
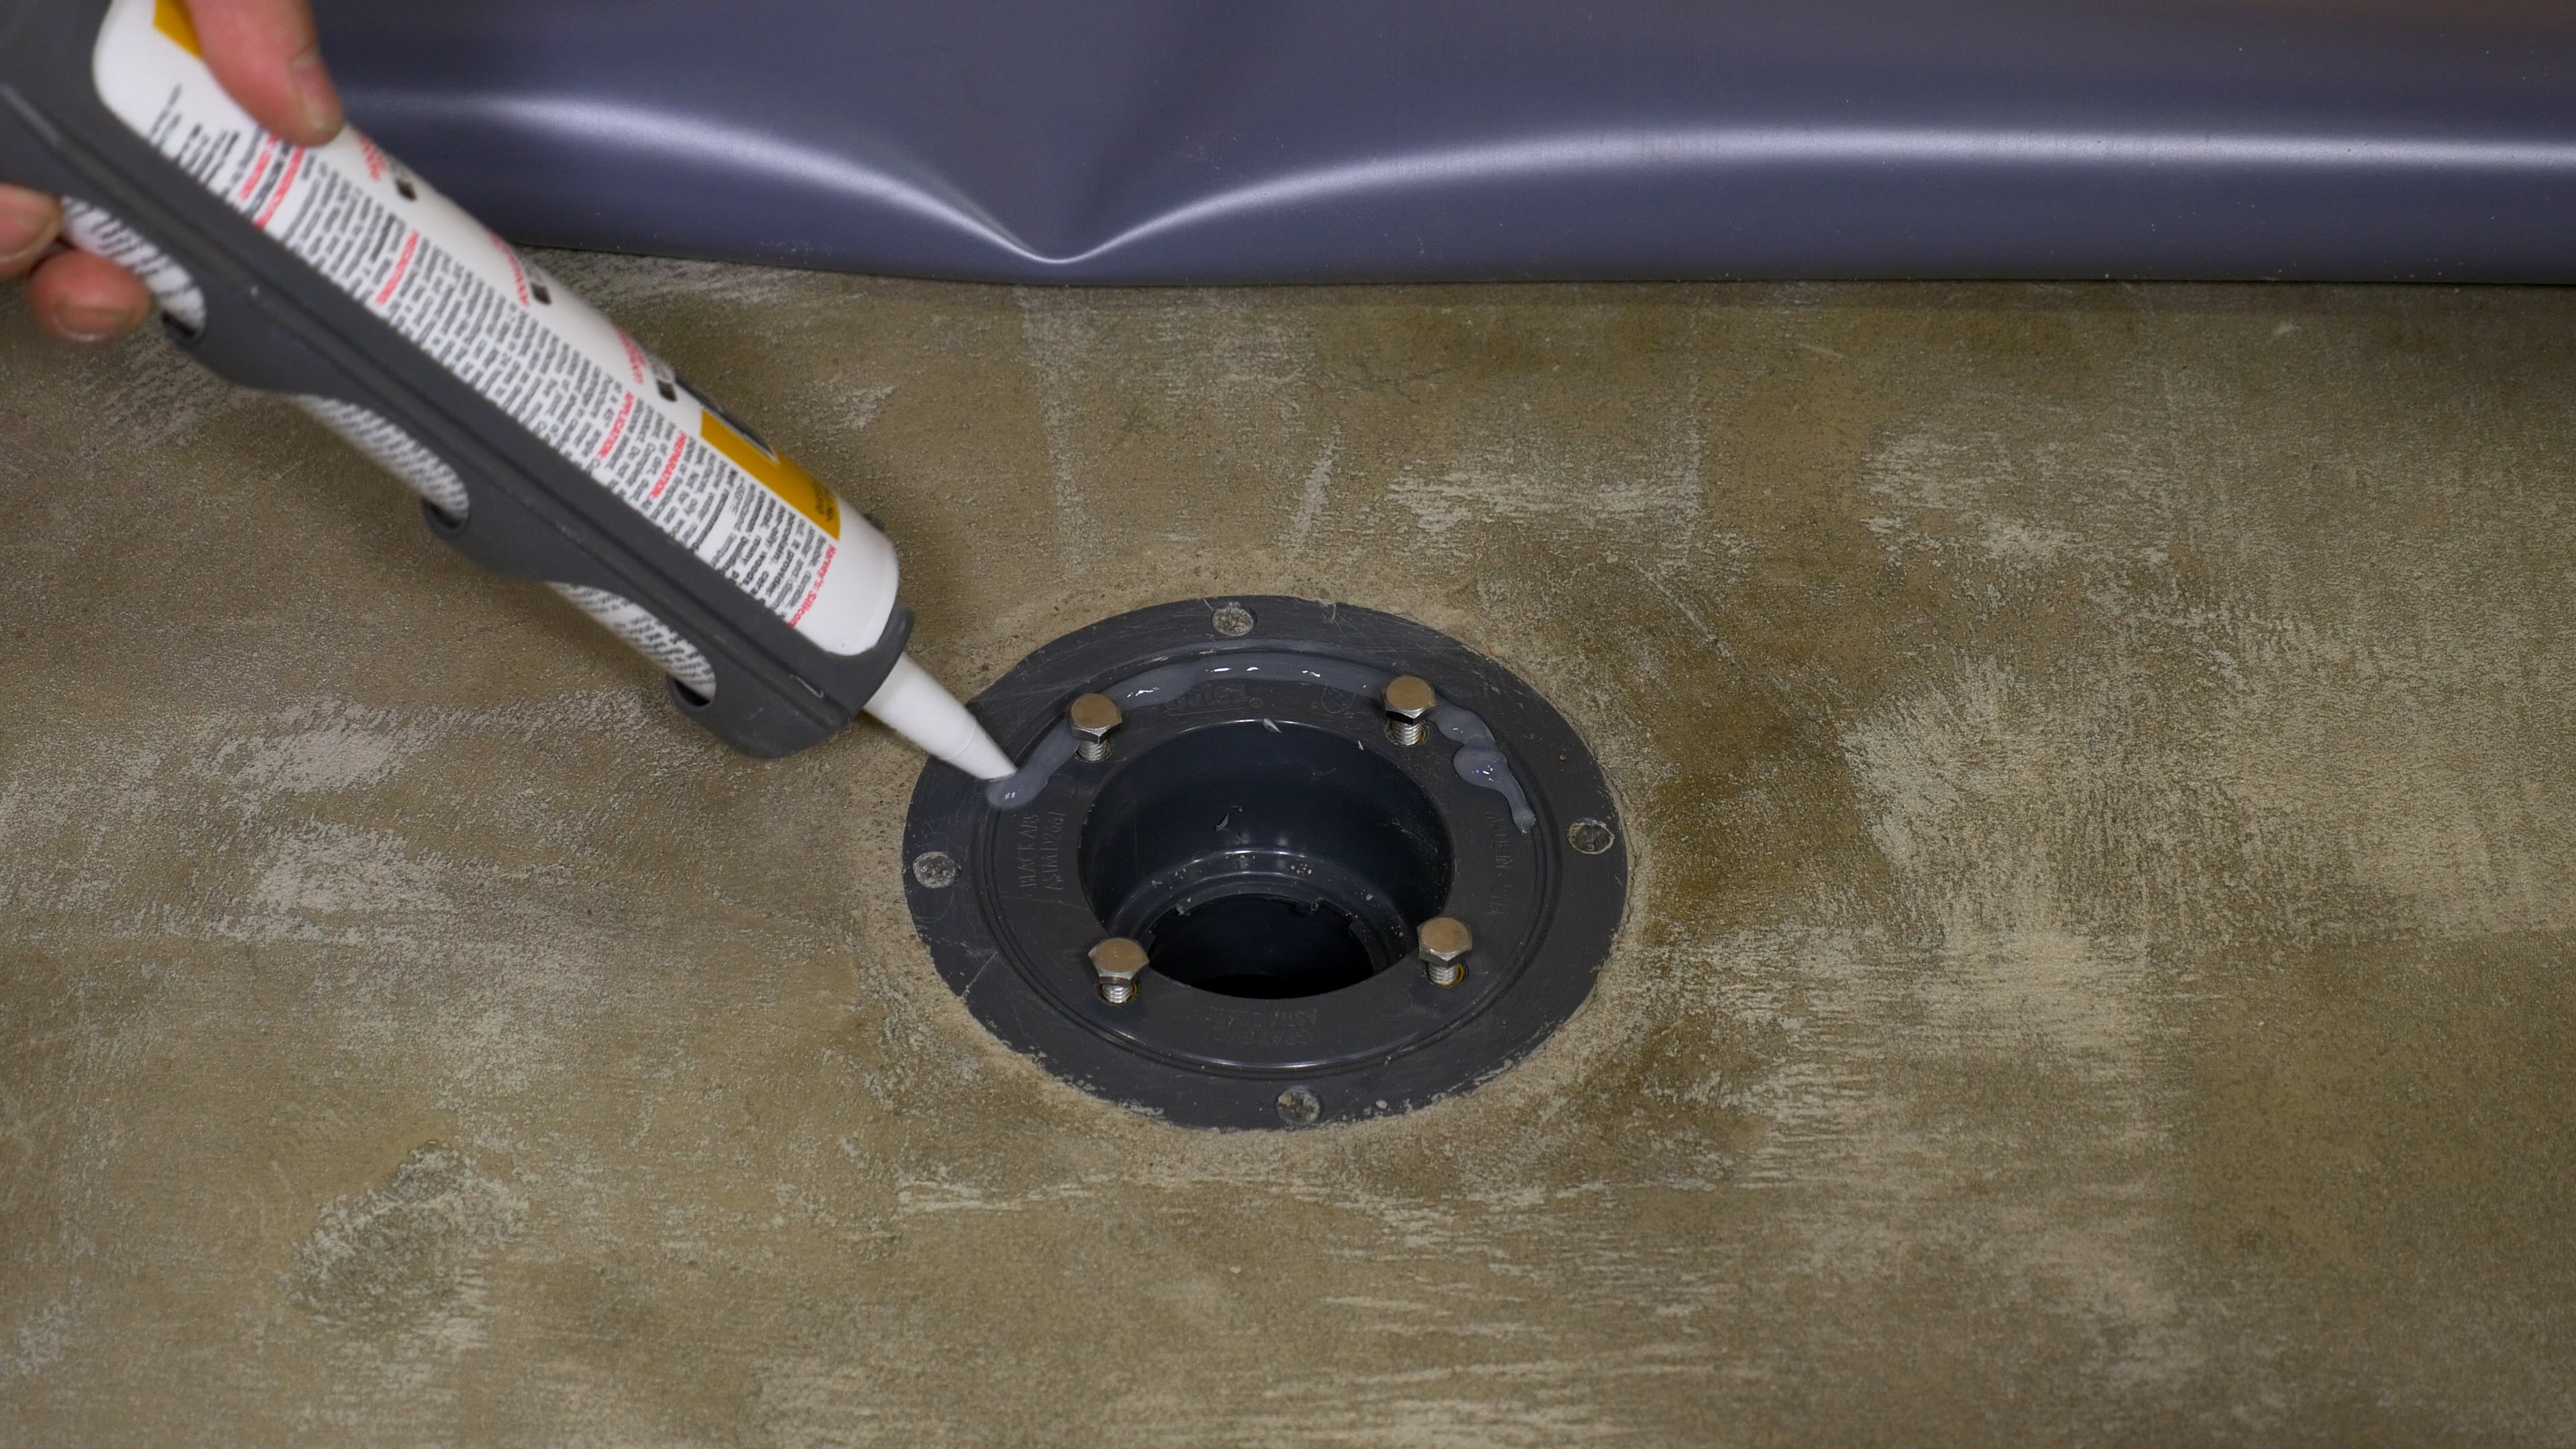
Fold the pan liner halfway over to expose the drain base and apply silicone caulk around the surface of the inner flange. Fold the liner back over, push the bolts through the X shapes in the liner and screw the clamping ring down over the four bolts. Finally, tighten the bolts until the ring has a snug fit against the liner. Put the test plug back into place.
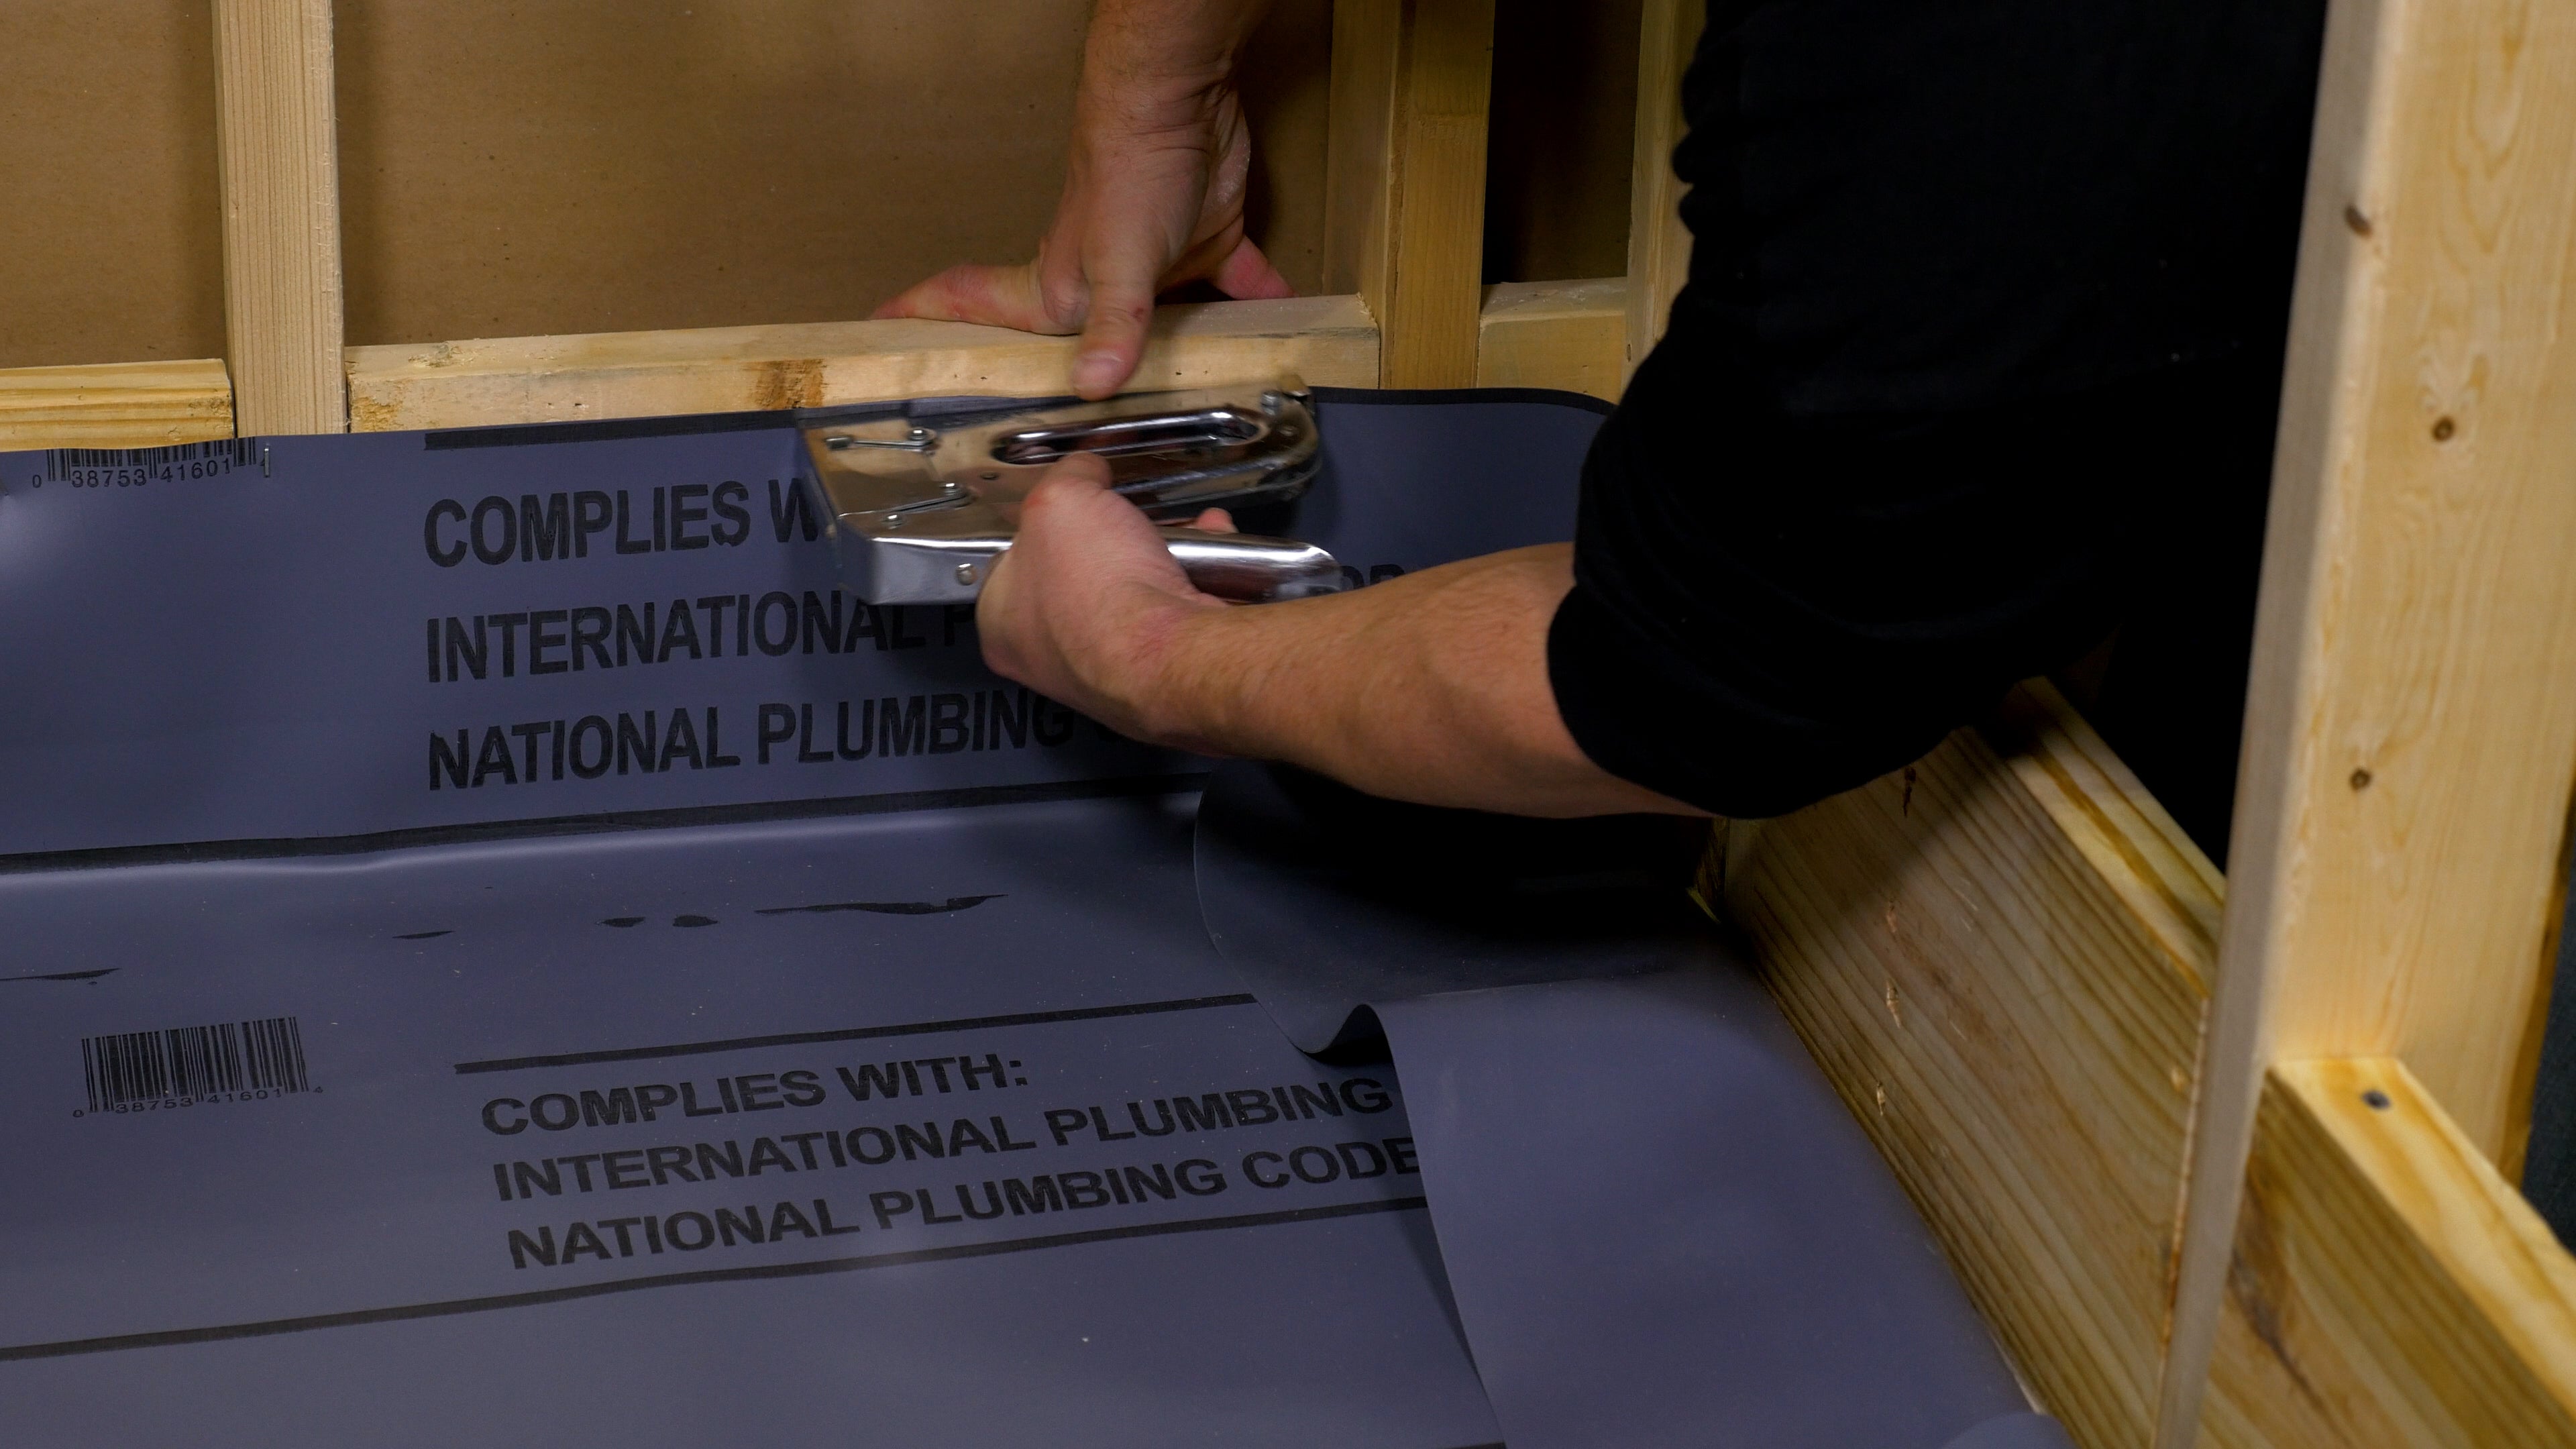
Tip: Only add staples to the top ½ in. of liner for maximum waterproof protection.
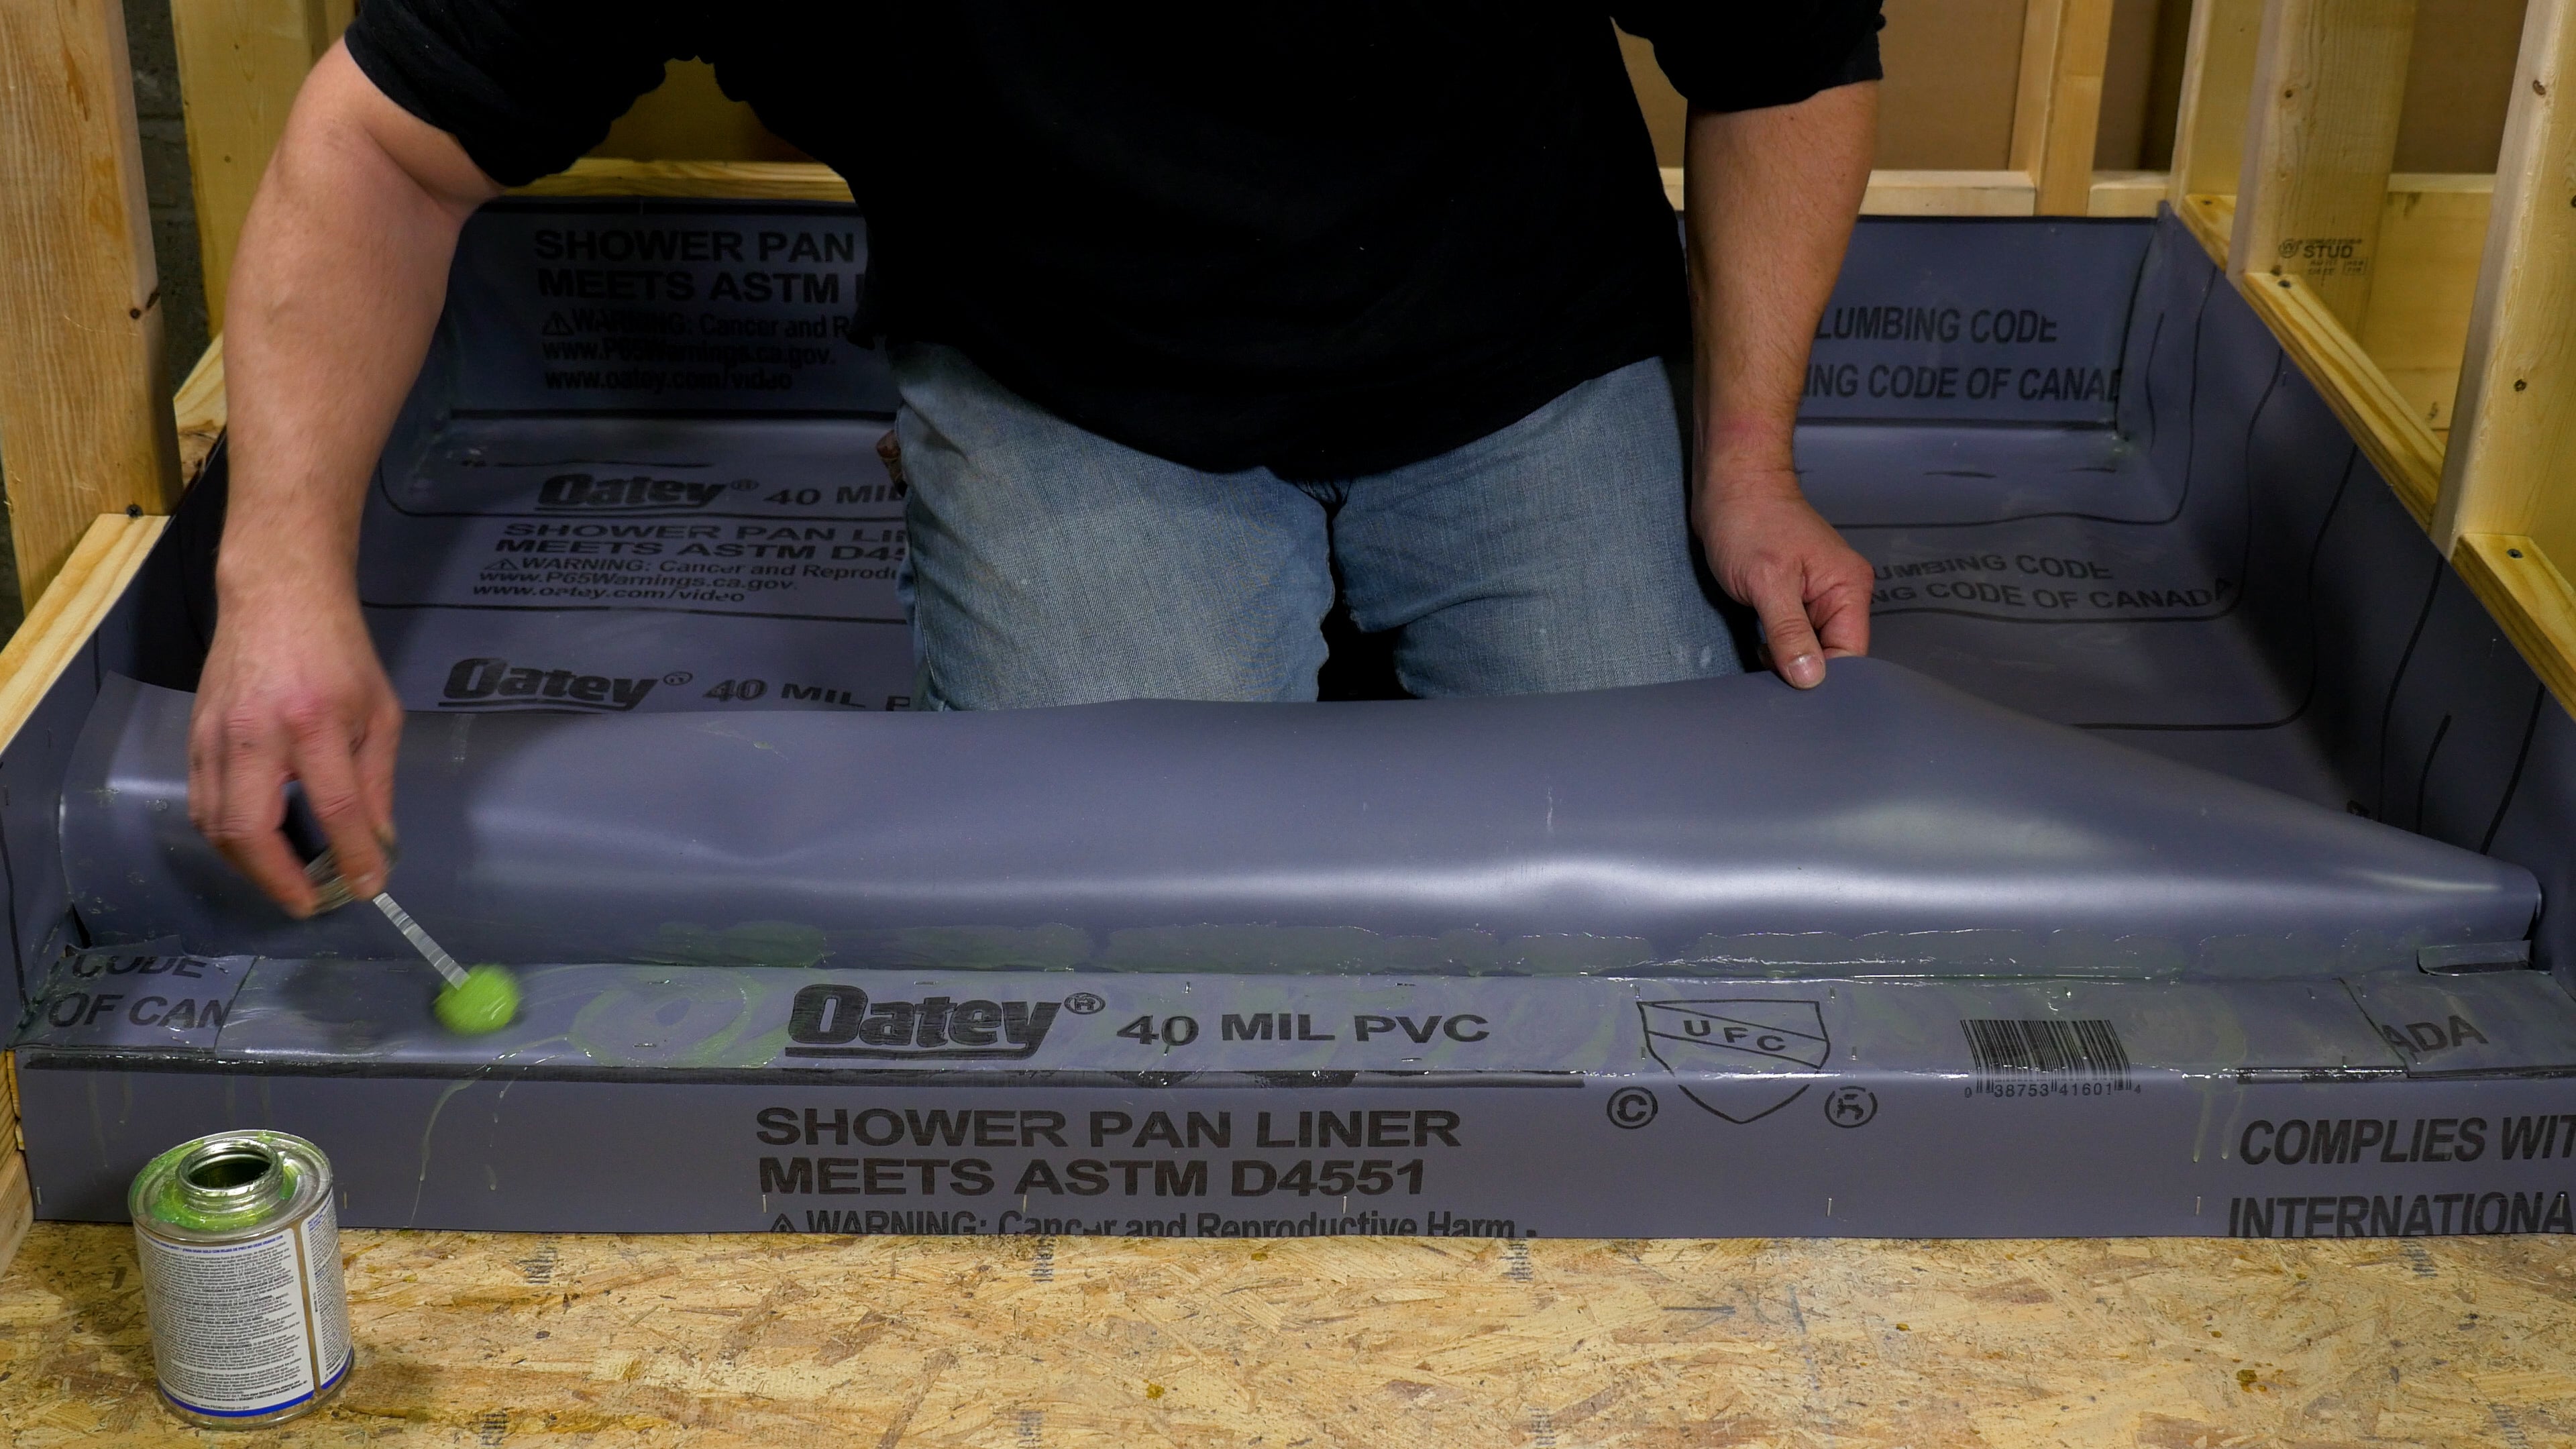
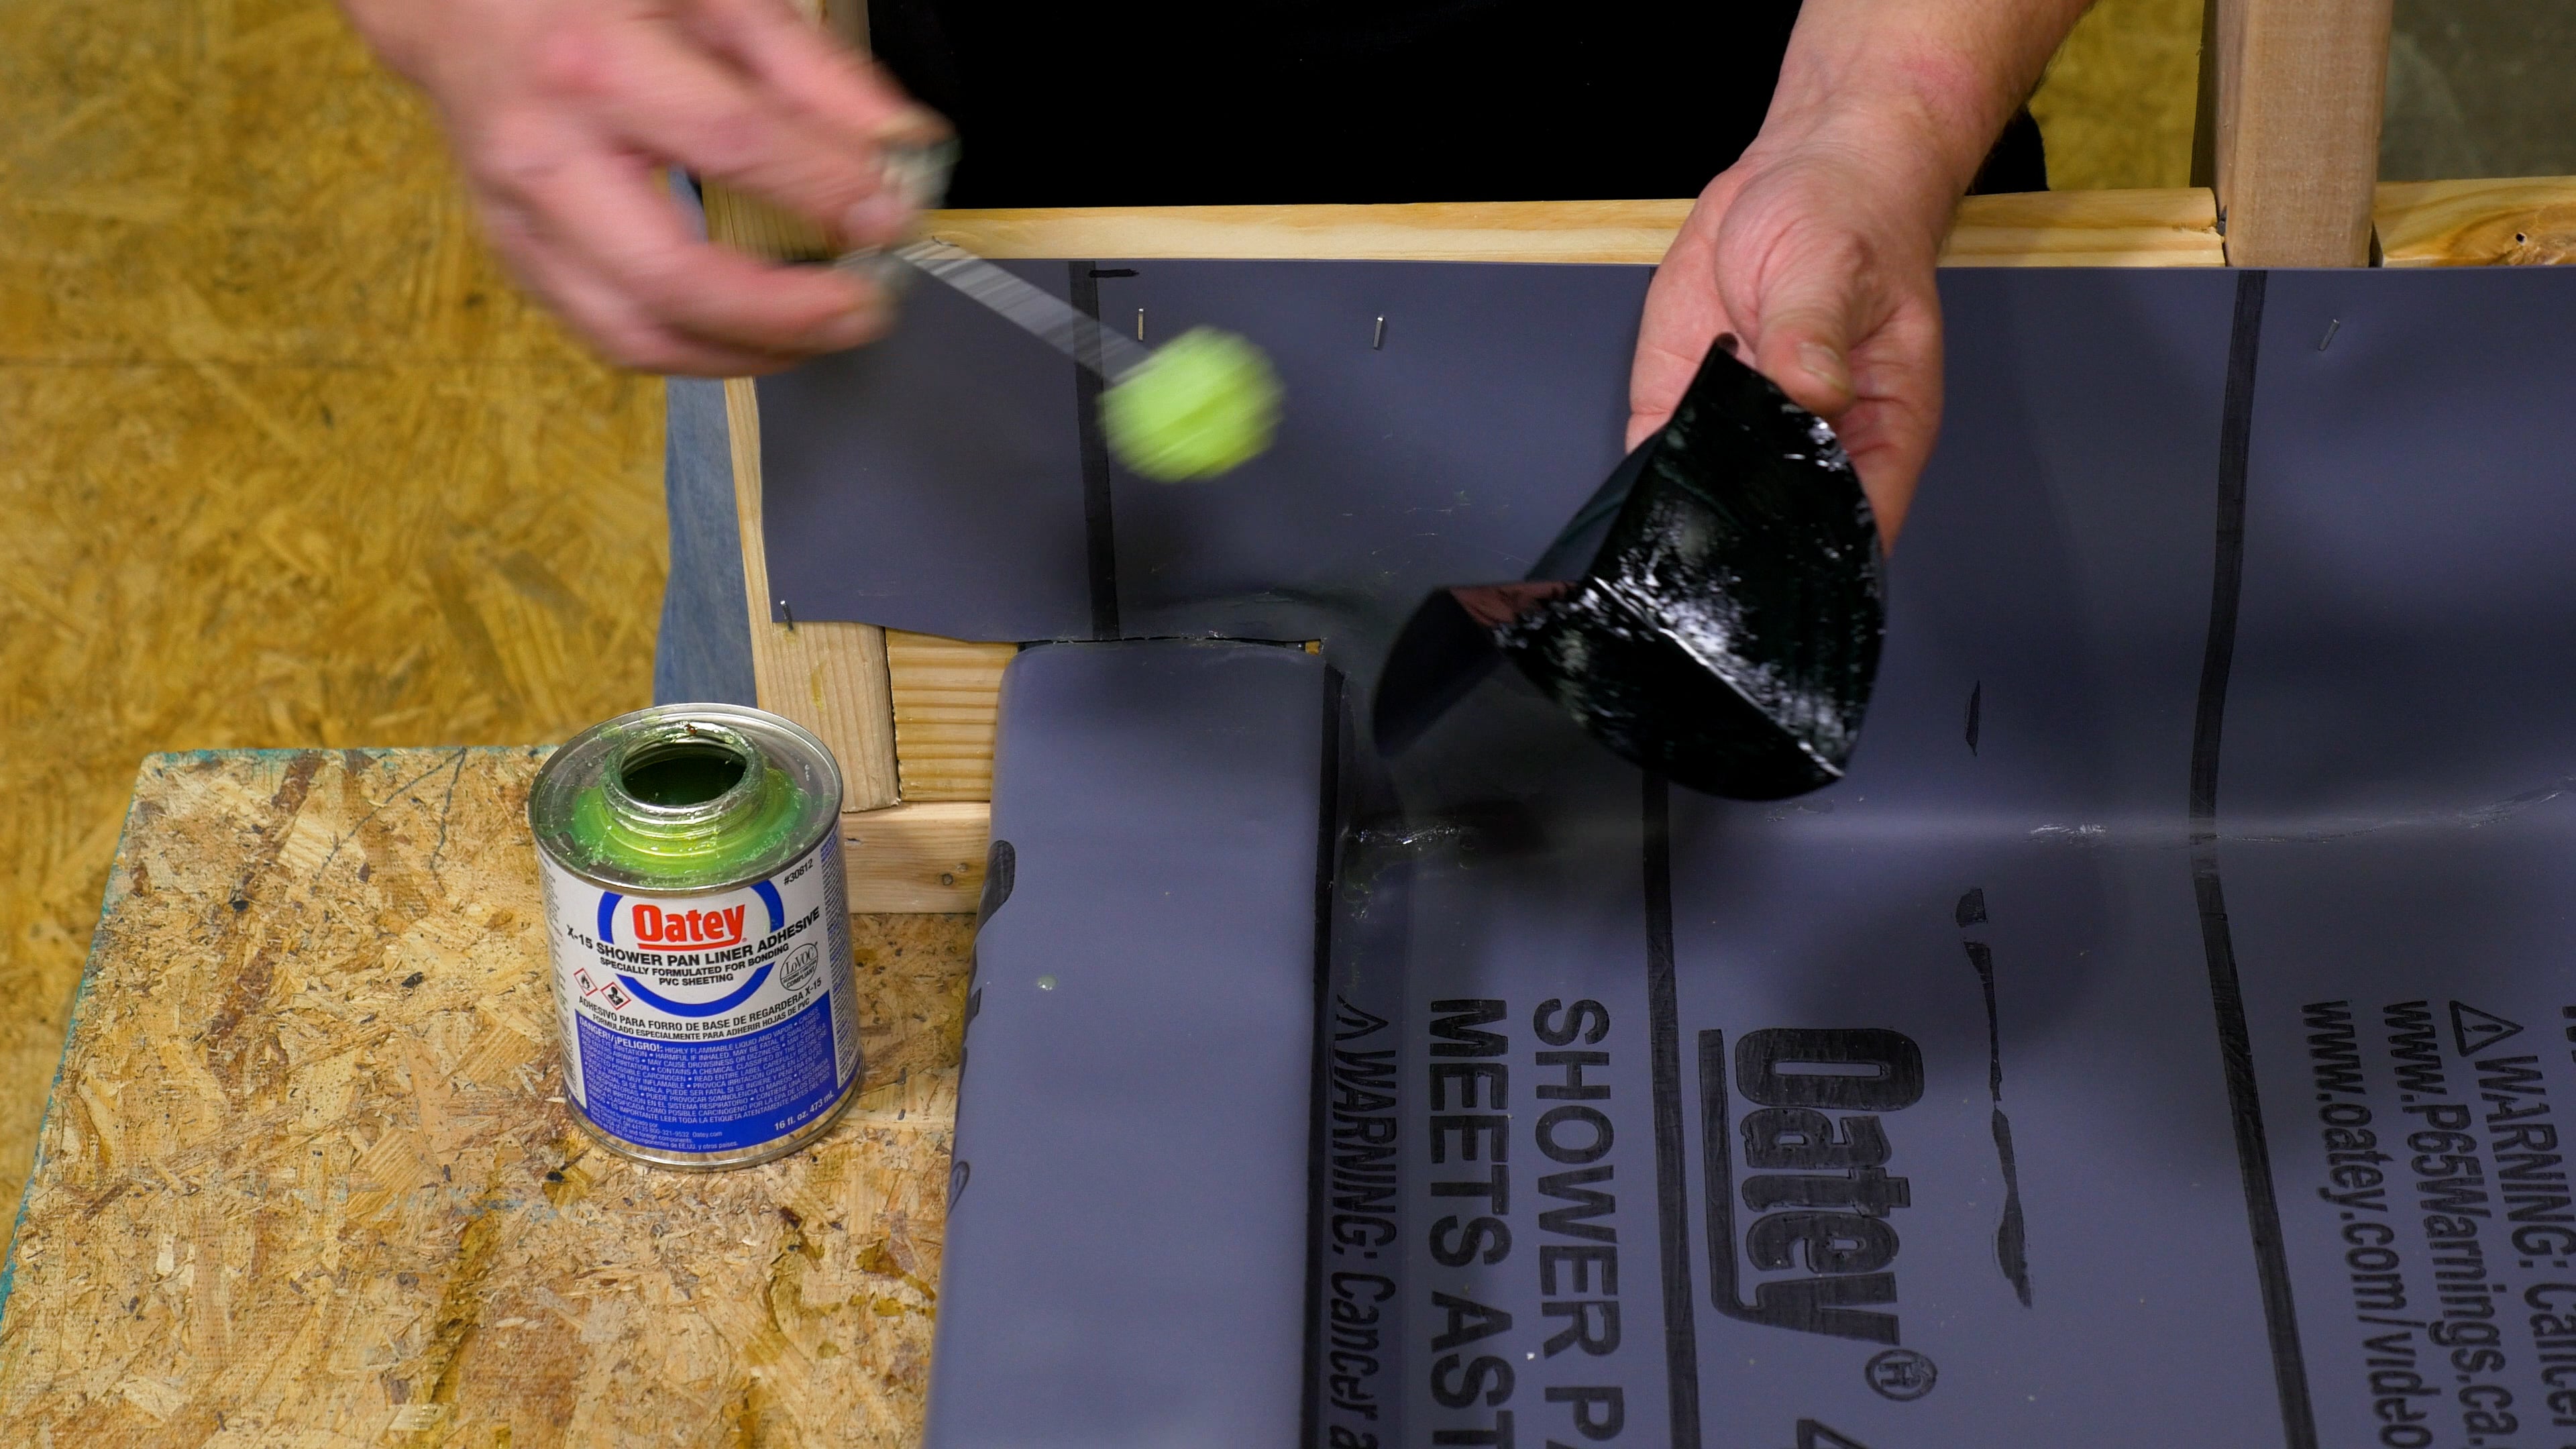
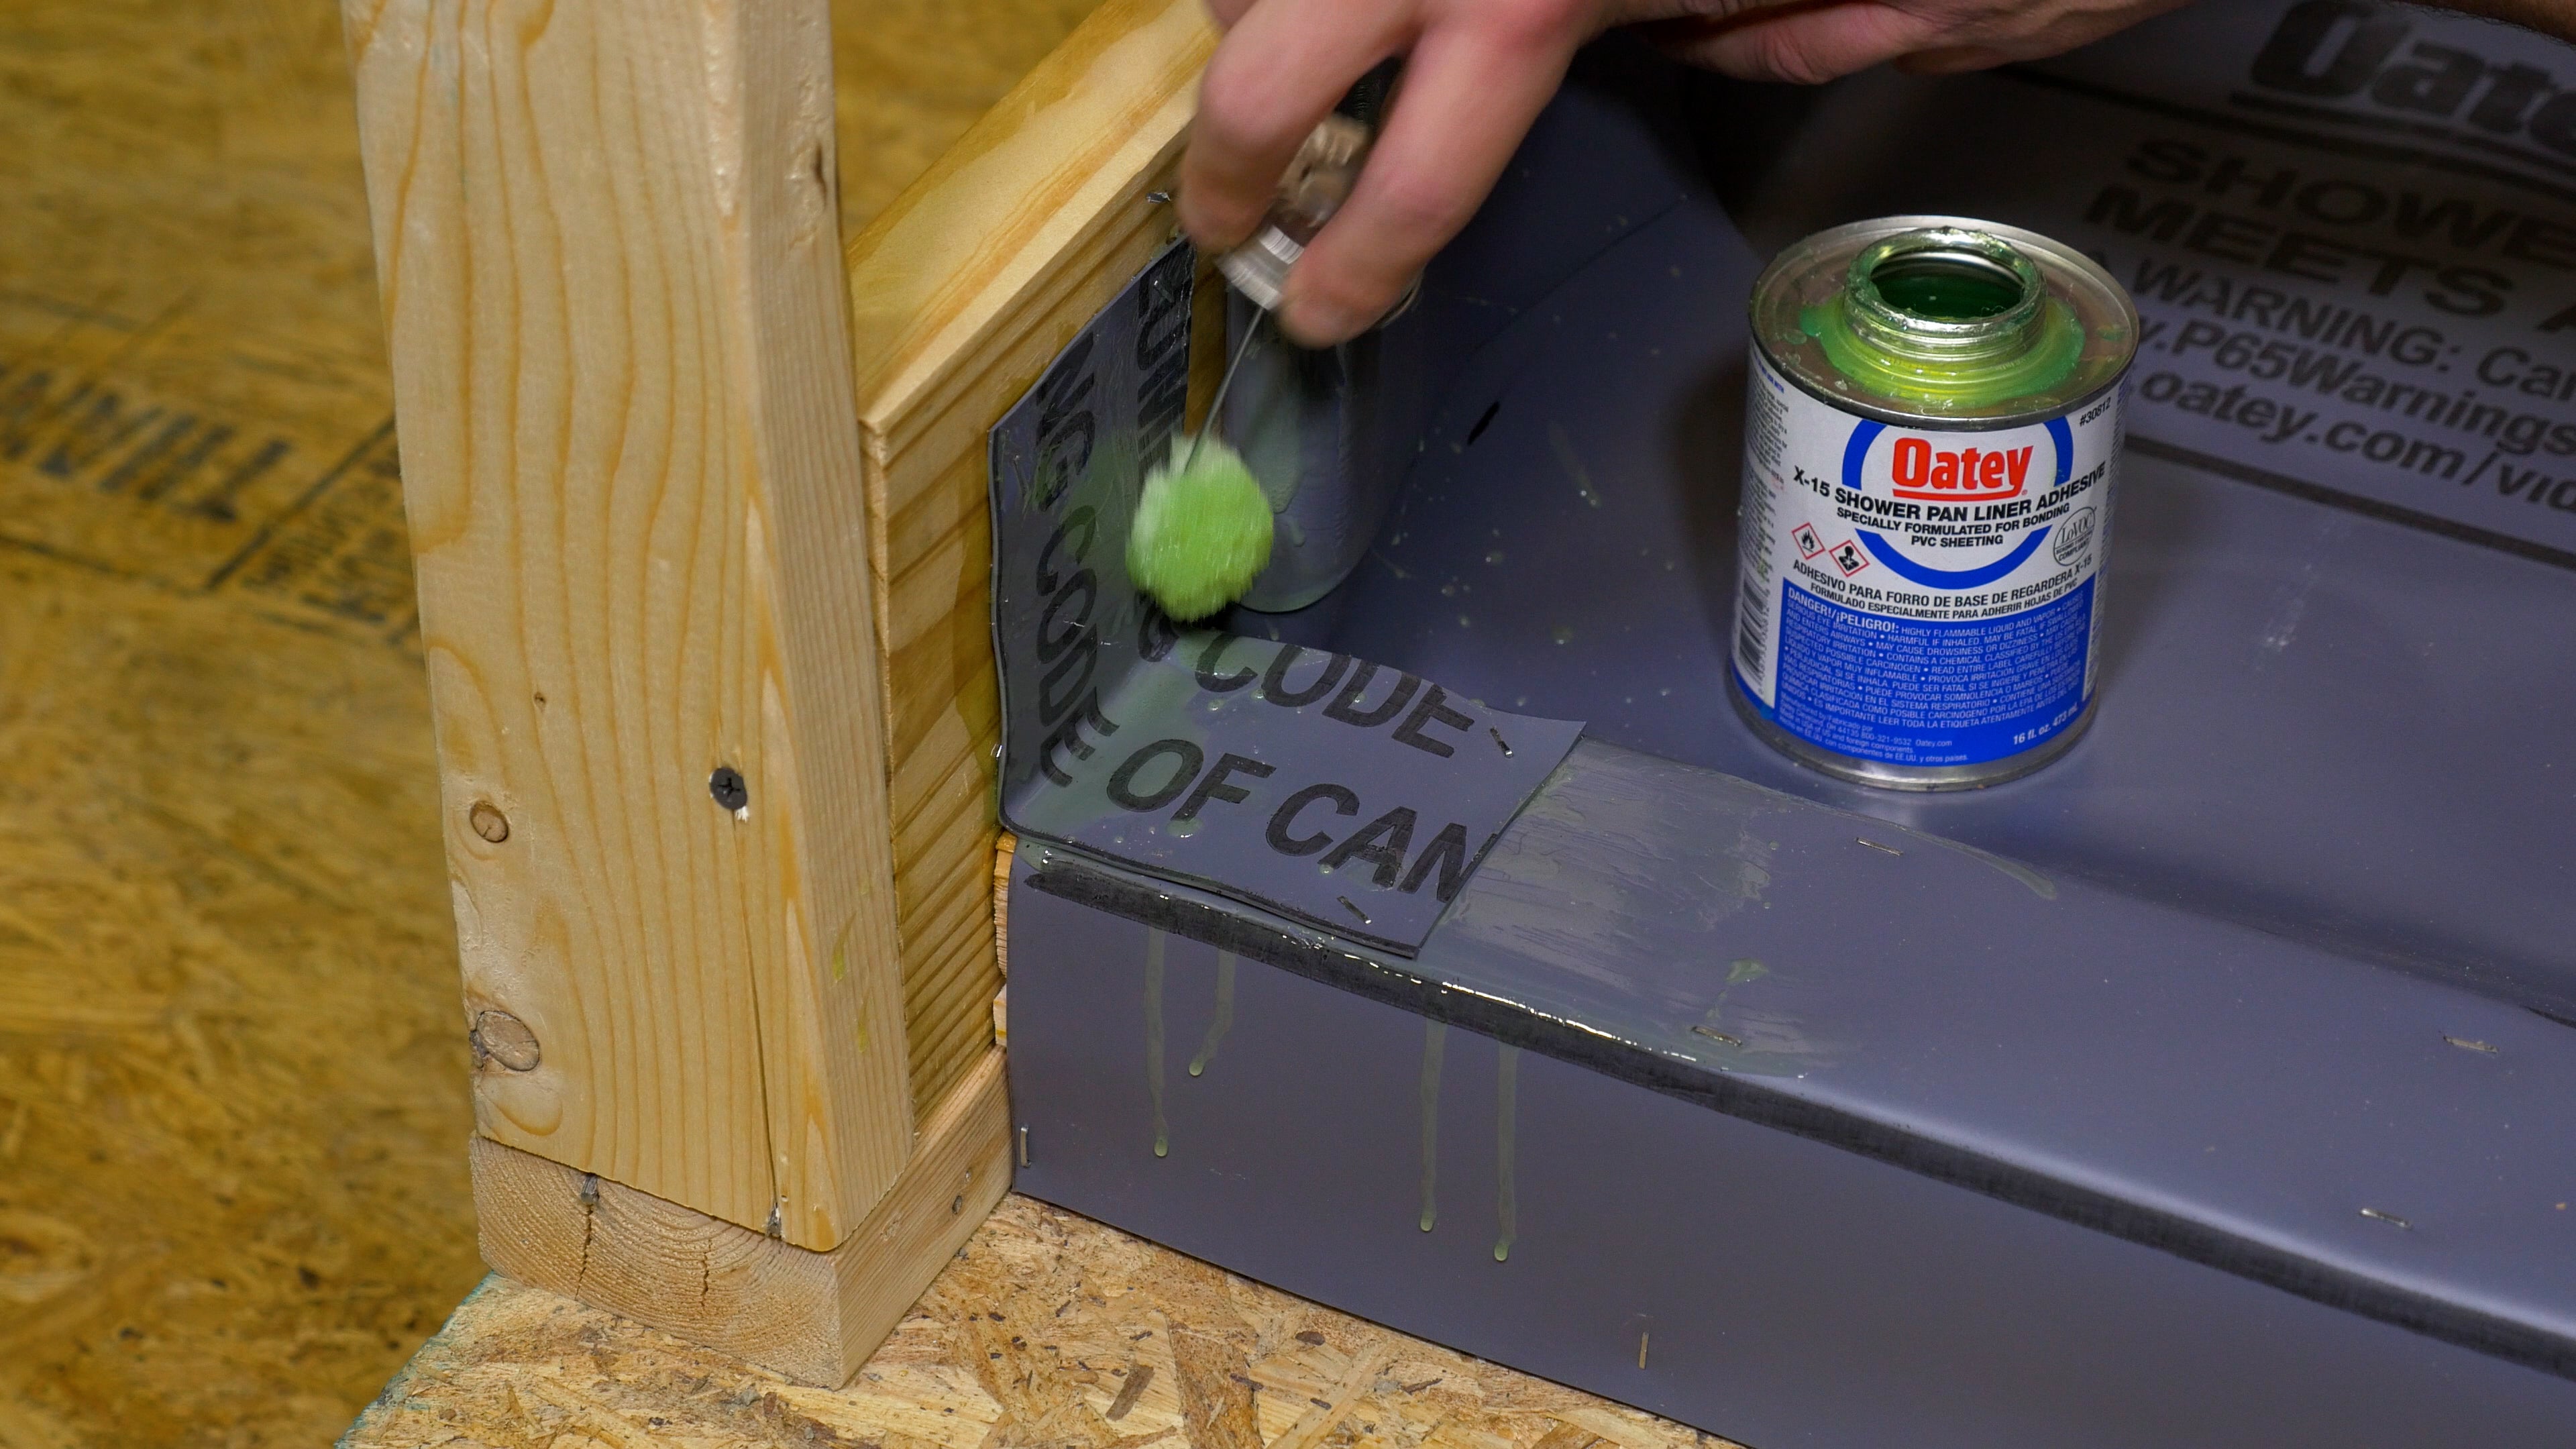
Fold corners and staple liner to wall framing lengthwise and add pan liner adhesive (Oatey X-15 for PVC liners and Oateyweld for CPE liners) to the excess in the folded corners to adhere them together before also stapling it to the wall framing.
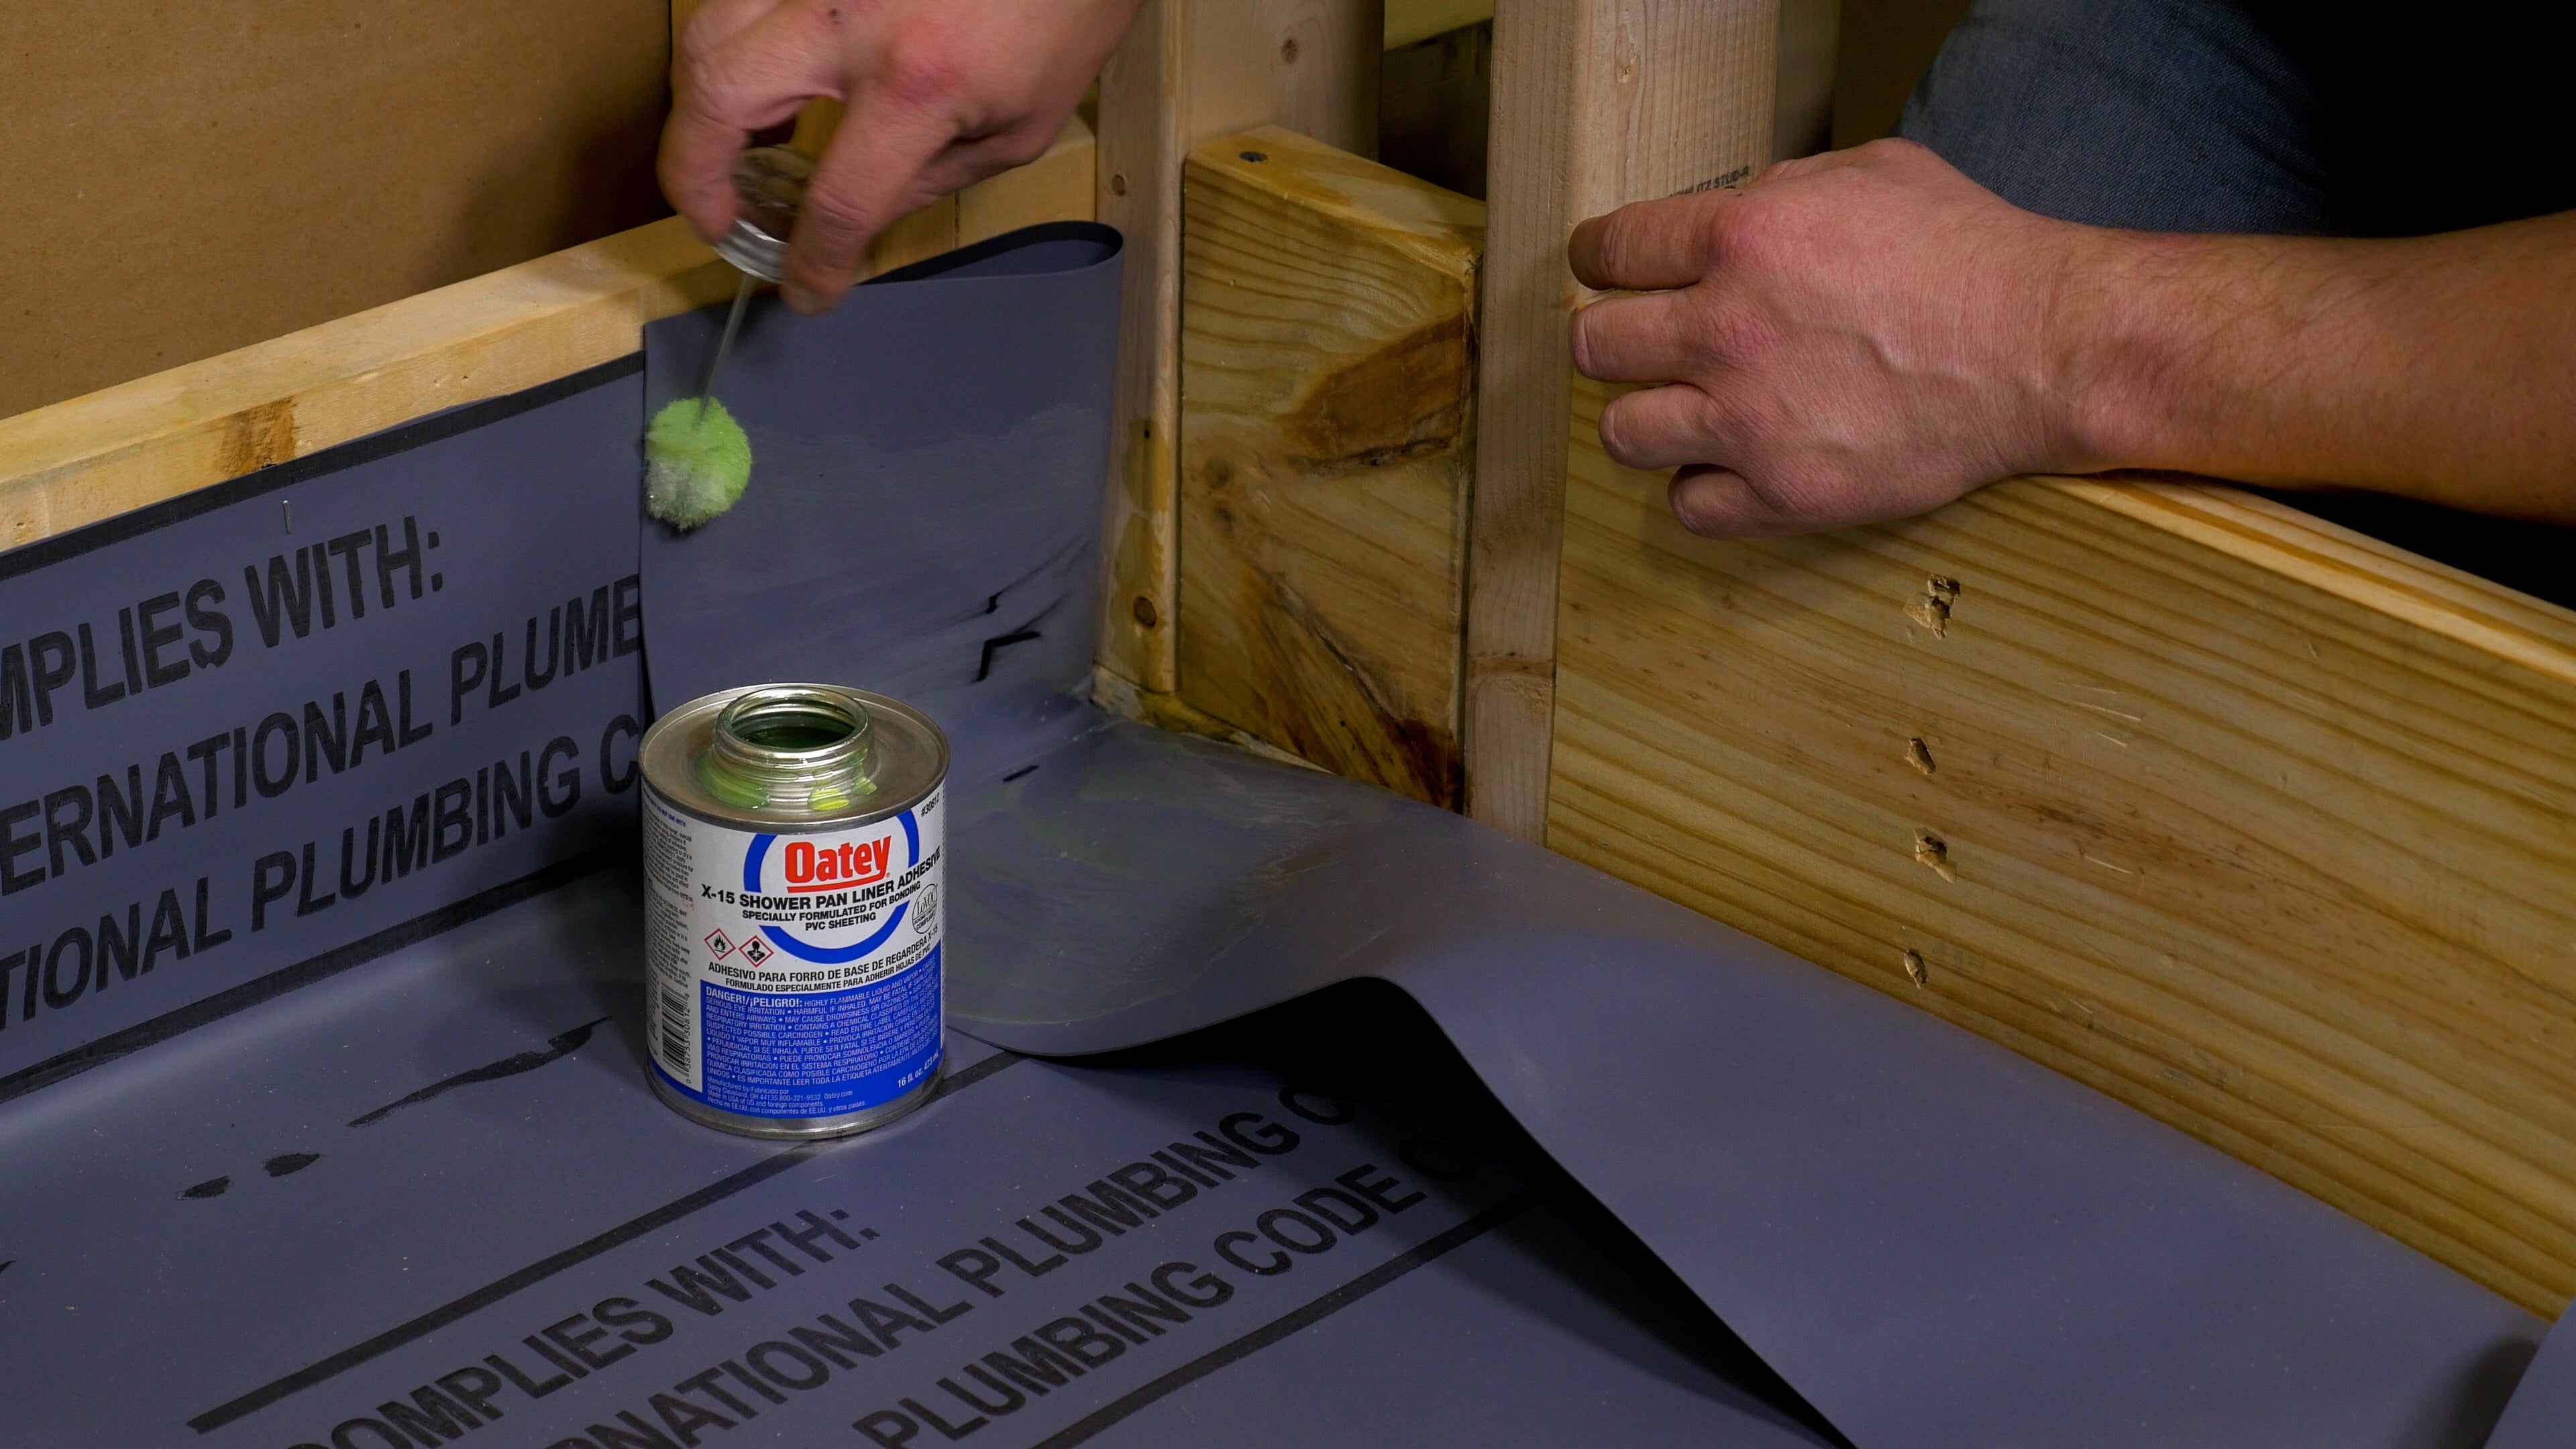
Cut 2 pieces of scrap liner in line with the width of the curb and a height of around 6 inches. Adhere both pieces on either side of the top of the curb, half on the curb and half on the wall framing. Cut the liner vertically at the inside corner and adhere it horizontally over the top of the scrap liner. Staple liner to wall framing and cut away any excess that hangs outside the shower dimensions. Finally, adhere excess pan liner for the mortar bed over the curb and staple the outside of the curb once again.
Tip: Staples or screws are unnecessary for use with dam corners.
Using X-15 or Oateyweld, stick the dam corners to any intersection between a curb and the wall framing.
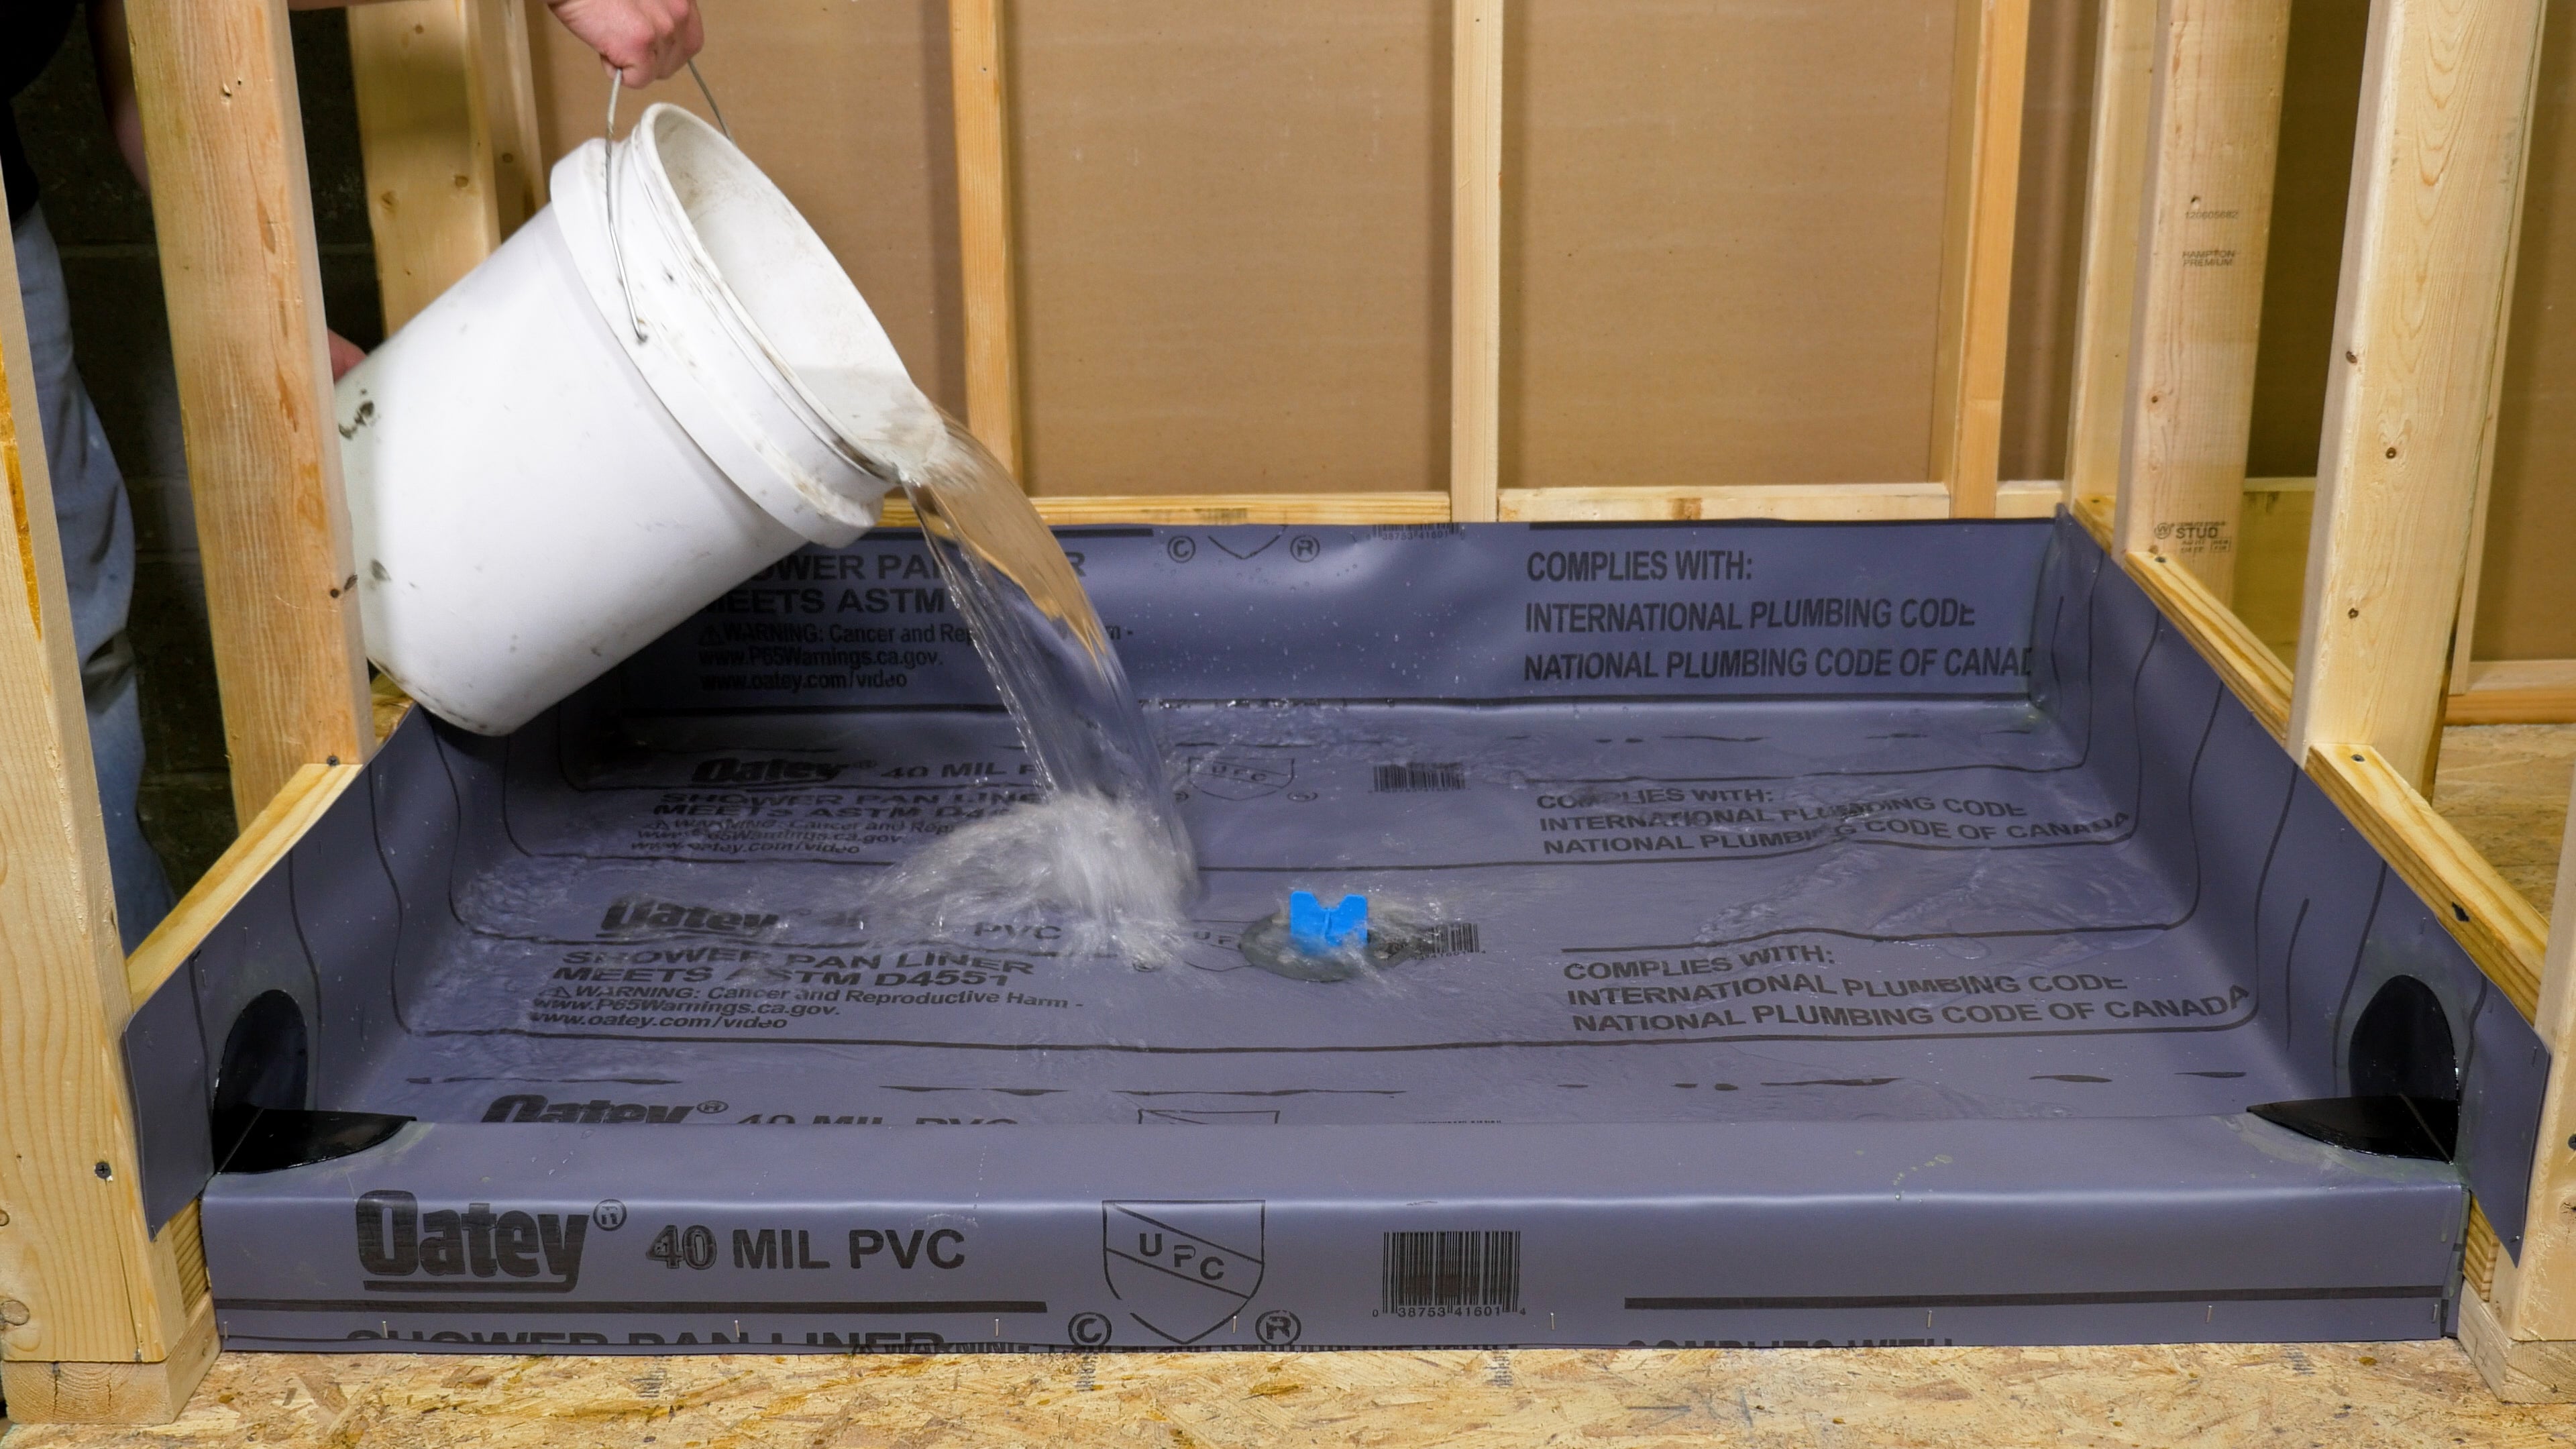
After letting the adhesives cure overnight, make sure the test plug is secure and pour water into the shower bed at a recommended height equal to that of the curb. Let the water sit for at least two hours to determine the waterproof status of your shower pan liner application. There are no leaks if the water level hasn’t dropped, the surrounding area is not wet and water is not leaking from the ceiling (if on an upper floor). Remove the test plug to drain the water.
After you have confirmed that your shower bed is watertight, you can look forward to the following stages of your shower install: which include choosing your drain and drain height, applying a mortar base on top of the pan liner, thinset application (the adhesive between mortar and tile), picking out your tiling, and application. For help completing your installation without any headaches, check out Oatey’s blog post on Common Shower Installation Errors and Waterproofing Tips.